Difference between revisions of "Doc:Tiling object"
(Created page with "<!-- Page info --> {{Title|Tile object}} {{Category|Manual}} {{Category|Tutorials}} {{Category|Tutorials Intermediate}} <!-- Page info end --> Here you'll learn a technique for ...") |
m (Text replace - "{{Category|NewTerminology}}" to "{{NewTerminology}}") |
||
| (2 intermediate revisions by 2 users not shown) | |||
| Line 4: | Line 4: | ||
{{Category|Tutorials}} | {{Category|Tutorials}} | ||
{{Category|Tutorials Intermediate}} | {{Category|Tutorials Intermediate}} | ||
| + | {{NewTerminology}} | ||
<!-- Page info end --> | <!-- Page info end --> | ||
| Line 10: | Line 11: | ||
In this tutorial I'm tiling a circle but the object can be anything, even an animated one.<br> | In this tutorial I'm tiling a circle but the object can be anything, even an animated one.<br> | ||
| − | + | [[Image:Tile-tut-01 render.png|frame|none]] | |
I start by creating a red circle layer with the radius 25 at pos 0,0.<br> | I start by creating a red circle layer with the radius 25 at pos 0,0.<br> | ||
I also create a {{l|Duplicate_Layer|Duplicate Layer}} above this (New Layer > Other > Duplicate) with the default settings.<br> | I also create a {{l|Duplicate_Layer|Duplicate Layer}} above this (New Layer > Other > Duplicate) with the default settings.<br> | ||
| − | + | [[File:Tile-tut-02 layers 0.63.06.png|frame|none]] | |
Now we're going to connect the duplicate layer with the circle to make copies of this.<br> | Now we're going to connect the duplicate layer with the circle to make copies of this.<br> | ||
| − | This is done by selecting the "Index 1" exported parameter in the {{l| | + | This is done by selecting the "Index 1" exported parameter in the {{l|Library_Panel|Library panel}}. This is the Index-value automatically exported from the Duplicate layer.<br> |
Now in the circle layer select the {{l|Origin_Parameter|''Origin''}} and convert it to {{l|Convert#Scale|scale}} (Right click > Convert > Scale)<br> | Now in the circle layer select the {{l|Origin_Parameter|''Origin''}} and convert it to {{l|Convert#Scale|scale}} (Right click > Convert > Scale)<br> | ||
Open Origin and select ''Scalar'', then right click and choose {{l|Connect|''Connect''}}.<br> | Open Origin and select ''Scalar'', then right click and choose {{l|Connect|''Connect''}}.<br> | ||
| Line 27: | Line 28: | ||
It continue making duplicates until the index value reached its ''To'' value, so here copies are created with index values of 1, 2 and 3.<br> | It continue making duplicates until the index value reached its ''To'' value, so here copies are created with index values of 1, 2 and 3.<br> | ||
| − | + | [[File:Tile-tut-03 layers 0.63.06.png|frame|center]] | |
Now with the default origin value of the circle of 0,0 all copies will be created on top of each other (all index values will scale with 0,0) so we have to add some value to the the origin to work with.<br> | Now with the default origin value of the circle of 0,0 all copies will be created on top of each other (all index values will scale with 0,0) so we have to add some value to the the origin to work with.<br> | ||
I want to tile the circle next each others without any gaps. The circle has a radius of 25, making it 50px wide. I then set the x value of ''Link'' wihin ''Origin'' to 50 and z is kept at 0. This moves the circle 50 px to the right. Now every copy will move 50 px further to the right (1x50, 2x50 and 3x50).<br> | I want to tile the circle next each others without any gaps. The circle has a radius of 25, making it 50px wide. I then set the x value of ''Link'' wihin ''Origin'' to 50 and z is kept at 0. This moves the circle 50 px to the right. Now every copy will move 50 px further to the right (1x50, 2x50 and 3x50).<br> | ||
With this setup I want to add more circles. This is done by increasing the ''To'' value of the Duplicate layer. I set this to 10. I also set the from value to 0, which will make the first circle to appear at origin 0,0 (0x50 x). These values gives a total of 11 copies.<br> | With this setup I want to add more circles. This is done by increasing the ''To'' value of the Duplicate layer. I set this to 10. I also set the from value to 0, which will make the first circle to appear at origin 0,0 (0x50 x). These values gives a total of 11 copies.<br> | ||
| − | + | [[Image:Tile-tut-04_11copies.png|frame|none]] | |
Now we will tile the row of circles in the y axis, making a grid.<br> | Now we will tile the row of circles in the y axis, making a grid.<br> | ||
| − | {{l| | + | {{l|Group|Group}} the circle and the Duplicate layer. Now we can treat this group much like the circle before.<br> |
| − | Create a new Duplicate layer above the | + | Create a new Duplicate layer above the Group layer. Convert the origin of the Group layer to scale, connect ''Scalar'' to ''Index 2'' which is a second exported value in the Library panel from the new Duplicate layer.<br> |
Now set the y value of the ''Link'' under ''Origin'' to 50 for offsetting 50px for each new copy.<br> | Now set the y value of the ''Link'' under ''Origin'' to 50 for offsetting 50px for each new copy.<br> | ||
I set From and To of the new duplicate value to 0 and 6 to make 7 rows of circles.<br> | I set From and To of the new duplicate value to 0 and 6 to make 7 rows of circles.<br> | ||
| − | + | Group again the Duplicate layer and the previously obtained Group layer so you can move everything together as one object. | |
| − | + | [[File:Tile-tut-05 layers 0.63.06.png|frame|center]] | |
Done!<br> | Done!<br> | ||
Download [[Media:Tile-tutorial-companion-file.sifz|tutorial file]]. | Download [[Media:Tile-tutorial-companion-file.sifz|tutorial file]]. | ||
Latest revision as of 10:12, 20 May 2013
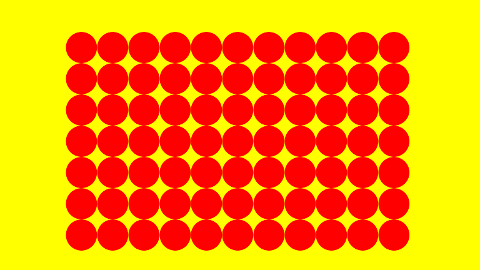
Here you'll learn a technique for tiling an object by multiplying it and placing the copies next to each others, forming a grid.
In this tutorial I'm tiling a circle but the object can be anything, even an animated one.
I start by creating a red circle layer with the radius 25 at pos 0,0.
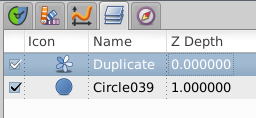
I also create a Duplicate Layer above this (New Layer > Other > Duplicate) with the default settings.
Now we're going to connect the duplicate layer with the circle to make copies of this.
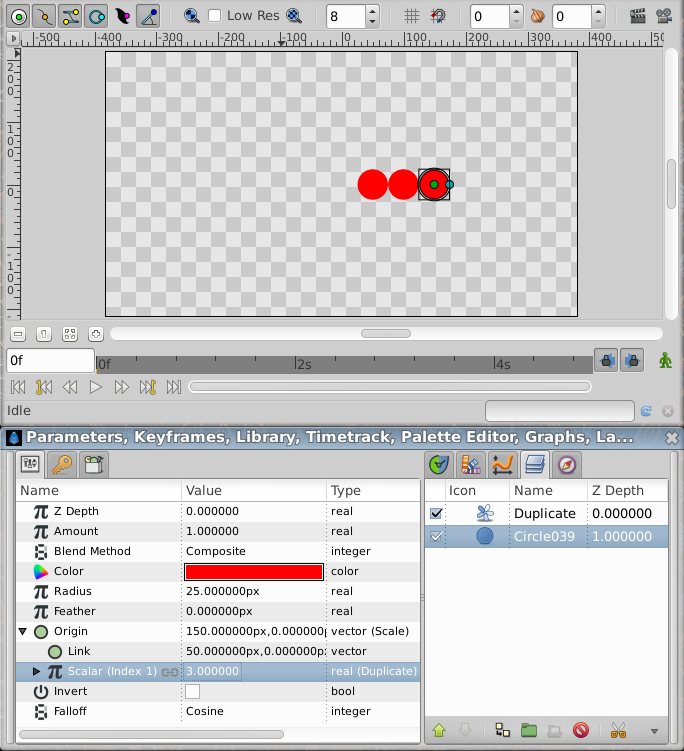
This is done by selecting the "Index 1" exported parameter in the Library panel. This is the Index-value automatically exported from the Duplicate layer.
Now in the circle layer select the Origin and convert it to scale (Right click > Convert > Scale)
Open Origin and select Scalar, then right click and choose Connect.
Now the circle will be duplicated by the Duplicate layer and the origin of all copies will be offset by the index value of the Duplicate layer.
In this screenshot the Duplicate layer is at it's default values with an index between 1 and 3 with a step of one. This means that 3 copies will be created.
The duplicate layer starts with one copy and gives it an index value of 1 (From value). It then creates a second duplicate with an index of 2, adding 1 (Step) to the previous index value (1).
It continue making duplicates until the index value reached its To value, so here copies are created with index values of 1, 2 and 3.
Now with the default origin value of the circle of 0,0 all copies will be created on top of each other (all index values will scale with 0,0) so we have to add some value to the the origin to work with.
I want to tile the circle next each others without any gaps. The circle has a radius of 25, making it 50px wide. I then set the x value of Link wihin Origin to 50 and z is kept at 0. This moves the circle 50 px to the right. Now every copy will move 50 px further to the right (1x50, 2x50 and 3x50).
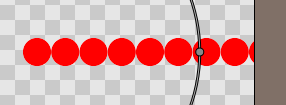
With this setup I want to add more circles. This is done by increasing the To value of the Duplicate layer. I set this to 10. I also set the from value to 0, which will make the first circle to appear at origin 0,0 (0x50 x). These values gives a total of 11 copies.
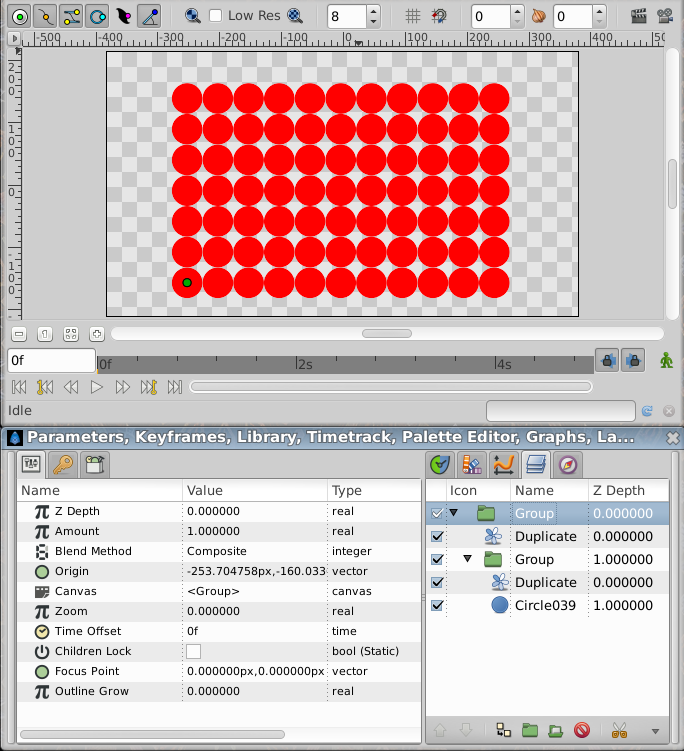
Now we will tile the row of circles in the y axis, making a grid.
Group the circle and the Duplicate layer. Now we can treat this group much like the circle before.
Create a new Duplicate layer above the Group layer. Convert the origin of the Group layer to scale, connect Scalar to Index 2 which is a second exported value in the Library panel from the new Duplicate layer.
Now set the y value of the Link under Origin to 50 for offsetting 50px for each new copy.
I set From and To of the new duplicate value to 0 and 6 to make 7 rows of circles.
Group again the Duplicate layer and the previously obtained Group layer so you can move everything together as one object.
Done!
Download tutorial file.

