Input Devices Dialog
From Synfig Studio :: Documentation
m (Typographical error) |
(Terminology Updated) |
||
| Line 2: | Line 2: | ||
{{Category|Dialogs}} | {{Category|Dialogs}} | ||
{{Category|File Menu (Toolbox)}} | {{Category|File Menu (Toolbox)}} | ||
| − | When available, this menu opens the Device Settings Dialogue and allows the user to setup | + | {{Category|NewTerminology}} |
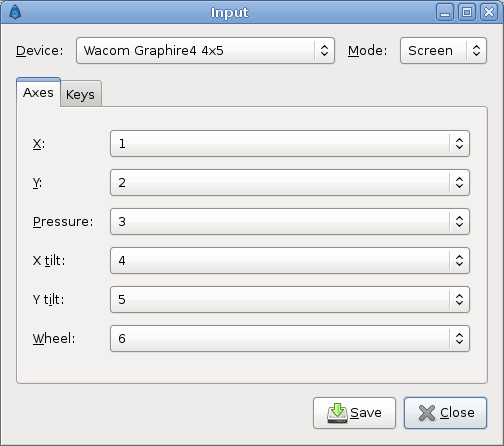
| − | Each tool will have its own values for each device | + | When available, this menu opens the Device Settings Dialogue and allows the user to setup custom values. It is recommended that only one device should be enabled, and the rest disabled. Set the mode of the enabled device to Screen. Usually there is no need to change anything else. Remember to save the settings before you close the dialog. |
| + | Each tool will have its own values for each device. So if you combine the Core pointer, which is always available, and the stylus, you will save a set of preferences (preferred fill, outline colors, brush size, selected tool, etc.) for each device. | ||
[[File:InputDevices.png]] | [[File:InputDevices.png]] | ||
Revision as of 14:19, 17 February 2013
When available, this menu opens the Device Settings Dialogue and allows the user to setup custom values. It is recommended that only one device should be enabled, and the rest disabled. Set the mode of the enabled device to Screen. Usually there is no need to change anything else. Remember to save the settings before you close the dialog. Each tool will have its own values for each device. So if you combine the Core pointer, which is always available, and the stylus, you will save a set of preferences (preferred fill, outline colors, brush size, selected tool, etc.) for each device.

