Render Dialog
From Synfig Studio :: Documentation
m (Terminology Updated) |
m (screenshot) |
||
| Line 8: | Line 8: | ||
It can be reached through the {{L|Canvas_Menu_Caret}} {{c|<File>|Render}}.<br/> | It can be reached through the {{L|Canvas_Menu_Caret}} {{c|<File>|Render}}.<br/> | ||
Let's have an in-depth look at it.<br/> | Let's have an in-depth look at it.<br/> | ||
| − | + | ||
| + | [[File:Render-settings 0.63.06.png|frame|center]] | ||
*'''Target''' | *'''Target''' | ||
| Line 31: | Line 32: | ||
**'''Bottom Right X:/Y:''' - set where in the workarea bottom right of render starts. | **'''Bottom Right X:/Y:''' - set where in the workarea bottom right of render starts. | ||
===Time tab=== | ===Time tab=== | ||
| − | + | [[File:Render settings time 0.63.06.png|frame|center]] | |
*'''Time Settings''' | *'''Time Settings''' | ||
**'''Frames per second''' - set render framerate. Only applicable when rendering to movie-file, not image sequences. | **'''Frames per second''' - set render framerate. Only applicable when rendering to movie-file, not image sequences. | ||
| Line 38: | Line 39: | ||
**'''Duration''' - set the duration of the animation.<br/> | **'''Duration''' - set the duration of the animation.<br/> | ||
===Other tab=== | ===Other tab=== | ||
| − | + | [[File:Render settings other 0.63.06.png|frame|center]] | |
TODO writeme (explain how to use "other tab" parameters | TODO writeme (explain how to use "other tab" parameters | ||
*'''Locks and Links''' | *'''Locks and Links''' | ||
Revision as of 21:34, 6 May 2013
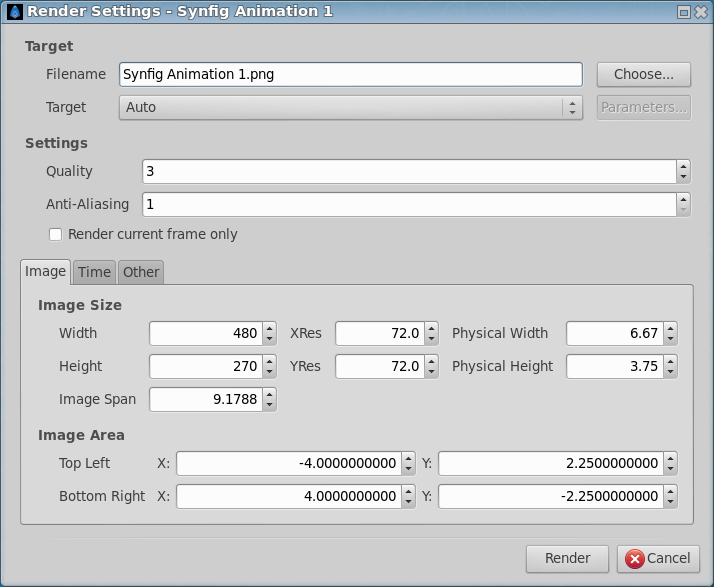
The "Render Dialog" lets you render your animation.
It can be reached through the Canvas Menu Caret "<File> → Render".
Let's have an in-depth look at it.
- Target
- Filename - Here you can set desired output filename and also a custom path to the render.
- Target - Set your output format. At "Auto" the format is decided by the filename suffix. If none is present png-format is default.
- Settings
- Quality - Set the quality of the render. 1 is highest quality but with longest render time. 9 is lowest quality but renders faster. 0 is even lower than 9 and seems to disable apha channels as well. Default quality is 3.
- Anti-Aliasing - Set the amount of anti-aliasing. Accepts values between 1 and 31, although values above 3 is very subtle improvements and hard to notice. higher values also adds considerable to render times.
- Render current frame only - With this ticked only one frame is rendered; the current one.
Then there are three tabs, we're starting with;
Image tab
- Image Size
- Width - set width of render in pixels.
- Height - set height of render in pixels.
- XRes - set horizontal resolution of render.
- YRes - set vertical resolution of render.
- Physical Width - set physical printing size of render. (Calculated from Width/XRes).
- Physical Height - set physical printing size of render. (Calculated from Height/YRes).
- Image Span - (?)
- Image Area - sets the portion of the workarea to be rendered.
- Top Left X:/Y: - set where in the workarea top left of render starts.
- Bottom Right X:/Y: - set where in the workarea bottom right of render starts.
Time tab
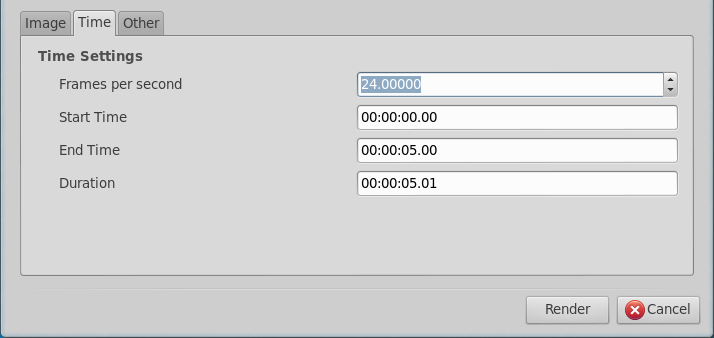
- Time Settings
- Frames per second - set render framerate. Only applicable when rendering to movie-file, not image sequences.
- Start Time - set where in your timeline rendered sequence will start.
- End Time - set where in your timeline rendered sequence will end.
- Duration - set the duration of the animation.
Other tab
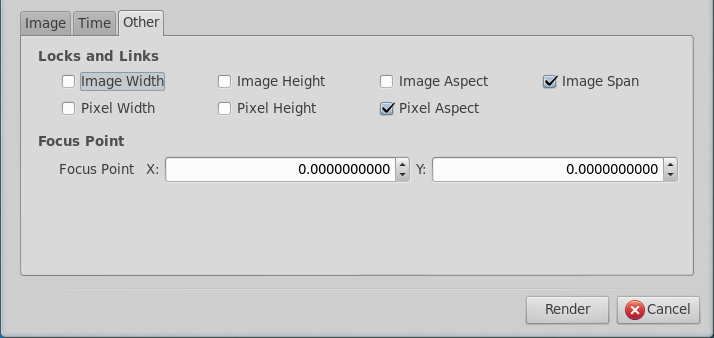
TODO writeme (explain how to use "other tab" parameters
- Locks and Links
- Image Width
- Image Height
- Image Aspect
- Image Span
- Pixel Width
- Pixel Height
- Pixel Aspect
- Focus Point
- Focus Point X:/Y:


