Time Track Panel
m (change "Main synfig window" reference to "Toolbox and New Layer Defaults") |
m (Screenshot update) |
||
| Line 4: | Line 4: | ||
{{NewTerminology}} | {{NewTerminology}} | ||
<!-- Page info end --> | <!-- Page info end --> | ||
| − | |||
[[File:time track icon.png|60px]] | [[File:time track icon.png|60px]] | ||
| Line 11: | Line 10: | ||
The {{l|Time Cursor|time cursor}} shows you with another vertical line at which frame you currently are at. | The {{l|Time Cursor|time cursor}} shows you with another vertical line at which frame you currently are at. | ||
| − | + | [[File:Timetrack_panel_0.63.06.png|center|frame]] | |
When you change an object property while in ''Animate Editing Mode'', for example by moving an object, a {{l|Waypoint}} is inserted. The rows of the Timetrack Panel are aligned with the {{l|Parameters Panel}}. If you are animating the individual vertices, you have to expand the vertices list to see their individual waypoints. | When you change an object property while in ''Animate Editing Mode'', for example by moving an object, a {{l|Waypoint}} is inserted. The rows of the Timetrack Panel are aligned with the {{l|Parameters Panel}}. If you are animating the individual vertices, you have to expand the vertices list to see their individual waypoints. | ||
| Line 17: | Line 16: | ||
You can drag those {{l|Waypoint|Waypoints}} through time, and you can change their {{l|Waypoints#Interpolation|interpolation method}} by right-clicking (eg. a sudden step change instead of a smooth transition). You can also change the default interpolation method from the {{l|Category:Toolbox}} in the {{l|New Layer Defaults}} section . The very bottom control sets the default method, and is initially set to {{l|Clamped}}. | You can drag those {{l|Waypoint|Waypoints}} through time, and you can change their {{l|Waypoints#Interpolation|interpolation method}} by right-clicking (eg. a sudden step change instead of a smooth transition). You can also change the default interpolation method from the {{l|Category:Toolbox}} in the {{l|New Layer Defaults}} section . The very bottom control sets the default method, and is initially set to {{l|Clamped}}. | ||
| − | [[File: | + | [[File:Timetrack panel Context menu 0.63.06.png|frame|center]] |
| − | + | ||
Holding {{Shortcut|CTRL}} allows you to select more than one waypoint for a given valuenode at a time. | Holding {{Shortcut|CTRL}} allows you to select more than one waypoint for a given valuenode at a time. | ||
Revision as of 07:44, 17 September 2013
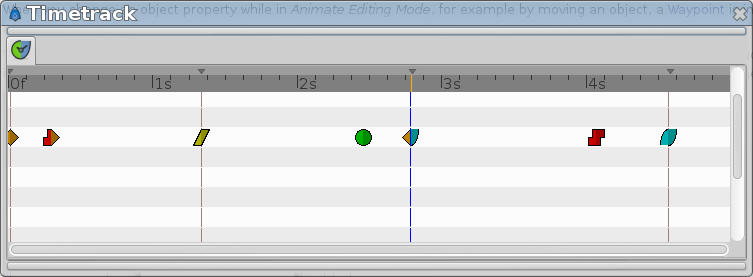
The "Timetrack Panel" shows a symbol (usually a green dot) for every Waypoint in the timeline.
Keyframes are represented by vertical lines through the timeline.
The time cursor shows you with another vertical line at which frame you currently are at.
When you change an object property while in Animate Editing Mode, for example by moving an object, a Waypoint is inserted. The rows of the Timetrack Panel are aligned with the Parameters Panel. If you are animating the individual vertices, you have to expand the vertices list to see their individual waypoints.
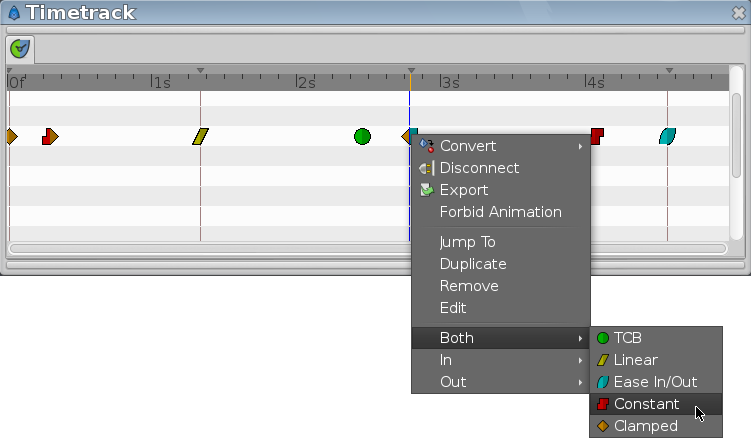
You can drag those Waypoints through time, and you can change their interpolation method by right-clicking (eg. a sudden step change instead of a smooth transition). You can also change the default interpolation method from the Toolbox Panel in the New Layer Defaults section . The very bottom control sets the default method, and is initially set to Clamped.
Holding Ctrl allows you to select more than one waypoint for a given valuenode at a time.
Holding ⇧ Shift when beginning to drag waypoints will copy them rather than moving them.
Holding Alt while clicking waypoints will delete them.
Further reading:

