Basic Bone Morphing
Introduction
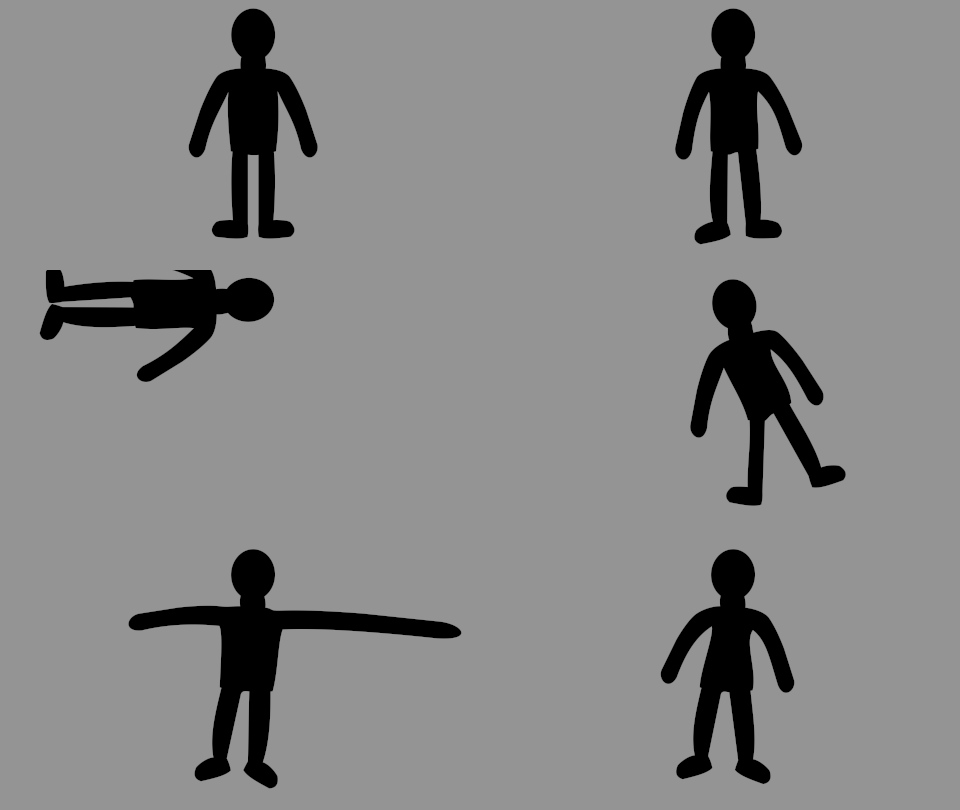
In this tutorial, we will learn how to move a character with the "Morphing by bones" we arrive at this result:
Preparation
First, we need to create a character in 1 piece, then create a skeleton in a well defined order, to avoid that everything does twist at the same time during the animation.
Once your "puppet" in the "Canvas" It must be added a skeleton. To add a skeleton layer, "New layer" → "Other" → "Skeleton"
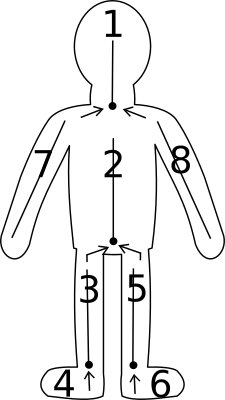
Here is a shema which shows the order in which you must create each bone:
First 1 then use the bone of 1 to create the 2 etc...
To create the 5 bone, use the 2 bone, the arrows represent what "bone" must be used to create the new "bone"
to create the 7 bone, use the bone 1, and 8 use the bone 1.
After you create the 1st bone (the head) click: "Switch handles widths"
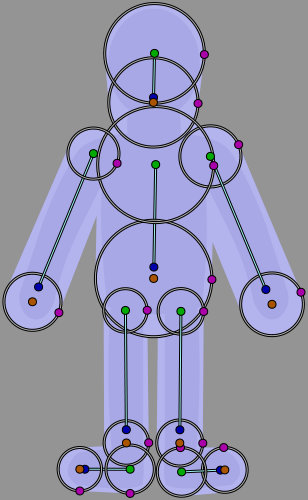
This will show you the widths of handles, it remains only to completely cover your puppet with each "bone" use the "Purple handle" to change the diameter of the width.
The rest you already know the "orange/brown" allows the lengthening of the segment (bone). the "blue" handle this is for orientation (corner handle) from the origin with a determined length, "green" This is the original/axis of rotation (handle position) to move the whole bone.
Once your first "bone" covers the entire head and neck, right-click on the skeleton and "Create a child bone" place him then on your puppet the shema will help you have a correct order (for the animation then).
Once finished and that your puppet is covered with bones, you have this:
Linking bones to members
Then select your puppet, in the "Layers panel" and then make a CtrlA in the canvas to select all vertices.
Then selected the layer "skeleton" We have create earlier, making CtrlClic, in the layers panel. In the "canvas" now right-click on one of the handles of the skeleton and make "Link to the skeleton".
You just have to create your animation.
Project file
The zip file containing parts of this tutorial may be found here: Skeleton-puppet
See also
Here's a video using the same technique on a character dispute: Development: Bones (part 7)


