Interface
This page needs a better layout!
-- En cours de traduction --
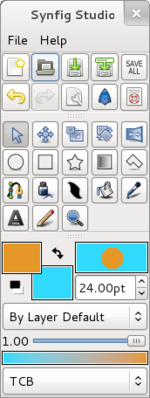
Synfig Studio ne démarre pas avec une seule fenêtre, mais il ouvre plusieurs fenêtres individuelles sur votre bureau. Si vous êtes familier de The GIMP, vous devriez reconnaître cet agencement. Cette page essaie de vous donner un apperçu des différents éléments que vous devriez trouver après avoir lancé synfig.
Contents
La Boîte à outils
La fenêtre Boîte à outils est la fenêtre principale de Synfig : même si vous avez ouvert plusieurs projets, il n'y aura qu'une seule Boîte à outil.
La fenêtre est divisée en trois zones ou panneaux :
- La première zone contient les boutons donnant acces aux opérations sur les fichiers habituelles : créer un nouveau fichier, ouvrir un fichier, sauver (tous les) fichier(s) (sous un nouveau nom), annuler et refaire ainsi qu'un acces à la configuration des fenêtres et au système d'aide.
- Juste en dessous ce trouve la palette des outils qui vous permettront de créer et de manipuler les objets (ou mieux : calque, car chaque objet est contenu dans son propre calque)). Vous trouverez une décription détaillée de chacun de ces outils ici.
- La dernière zone contient la configuration par défaut pour les nouveaux calques : couleurs de l'avant- et arrière plan, épaisseur du tracé, opacité et mode pour le calque.
La fenêtre Canevas
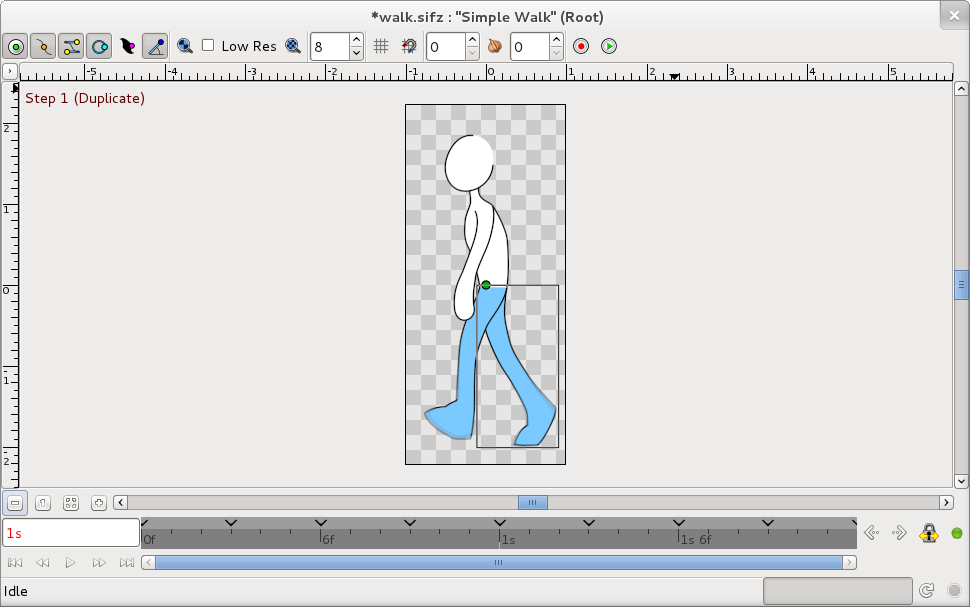
Une fois que vous avez ouvert un fichier ou créé un nouveau projet (par exemple à l'aide des boutons de la boîte à outils) vous verrez la fenêtre canevas. C'est l'endroit où vous créerez votre animation !
Alors que la plupart des applications graphiques ont un ensemble de menus en haut de l'écran, de la fenêtre MDI, ou de la zone de dessin, Synfig a un caret : un petit triangle noir dans le coin supérieur gauche du canevas sous lequel vous trouverez tous les menus que vous pourriez attendre et qui vous permettront d'accéder à la plupart des fonctionnalités de Synfig.
The area with the grey check-board pattern is your working area in which you can create elements/layers and manipulate them.
The timeline that you can see in the picture here only appears when you have defined a non-zero duration in the settings dialog of your project. To the left you can see the number of the current frame and on the right side two buttons to switch the animation status and to lock/unlock the keyframes. The Bases de l'Animation Tutorial gives a good introduction on how to work with this buttons.
In the picture above there are three elements on the canvas, the black curve - called BLine - is selected. The little coloured dots control the curve and are called ducks.
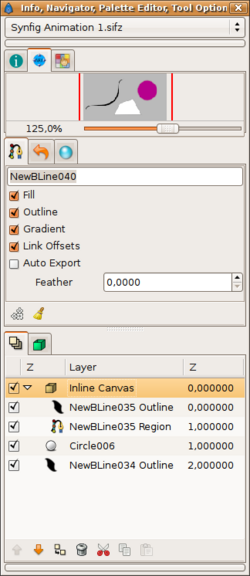
The third window contains again three areas, each of which can show different panels: in this picture the Panneau Navigateur, the Panneau Options des Outils and the Panneau Calques are active.
You can access detailed descriptions of the other panels here.
The Parameter and Time Track Panel
The fourth and last window shows the Params Panel/fr, where you can find detailed parameters and settings for the active element like colour, width, opacity, location and so on. To the right is the Time Track Panel that allows you to create and modify Points de Passages.


