Editore Gradiente
(Created page with "<!-- Page info --> {{Title|Gradient Dialog}} {{Category|Dialogs}} <!-- Page info end --> The Gradient Editor Dialog has two sections. The top part is for selecting the colors an...") |
m |
||
| Line 1: | Line 1: | ||
<!-- Page info --> | <!-- Page info --> | ||
| − | {{Title| | + | {{Title|Editore Gradiente}} |
{{Category|Dialogs}} | {{Category|Dialogs}} | ||
<!-- Page info end --> | <!-- Page info end --> | ||
| − | + | L'Editore Gradiente ha due sezioni. La parte superiore per la selezione dei colori e il livello Alfa, la parte inferiore presenta un'anteprima del gradiente. | |
| − | + | Appena sotto l'area di anteprima vi sono due piccoli cursori triangolari, detti CPunti, che indicano i colori iniziale e finale del gradiente. | |
| Line 12: | Line 12: | ||
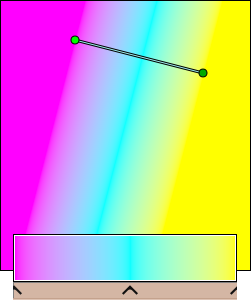
| − | + | Il CPunto attualmente selezionato viene visualizzato con un cursore triangolare bianco. Il suo colore è mostrato in alto nella finestra di editazione. Puoi selezionare qualsiasi altro CPunto cliccando sul suo cursore per variare gli altri colori del gradiente. | |
| − | + | Modificando ad esempio i canali rosso, verde e blu del CPunto a destra si può cambiare il colore finale del gradiente (preimpostato a bianco) ad un giallo scuro che ci aggrada come nell'esempio seguente. | |
Revision as of 13:53, 19 October 2011
|
Warning! This page contains outdated information. The release of Synfig Studio 0.64.0 introduced new terminology and this translated page needs to be updated according to original English text. You can help updating this page - see instructions here. Thank you! |
L'Editore Gradiente ha due sezioni. La parte superiore per la selezione dei colori e il livello Alfa, la parte inferiore presenta un'anteprima del gradiente.
Appena sotto l'area di anteprima vi sono due piccoli cursori triangolari, detti CPunti, che indicano i colori iniziale e finale del gradiente.
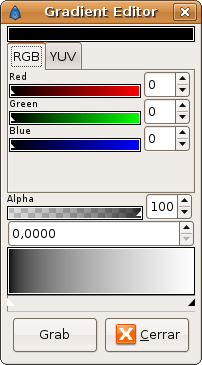
Il CPunto attualmente selezionato viene visualizzato con un cursore triangolare bianco. Il suo colore è mostrato in alto nella finestra di editazione. Puoi selezionare qualsiasi altro CPunto cliccando sul suo cursore per variare gli altri colori del gradiente.
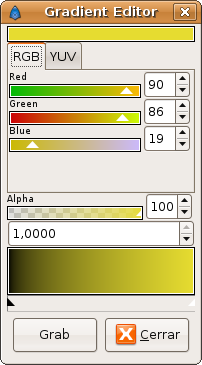
Modificando ad esempio i canali rosso, verde e blu del CPunto a destra si può cambiare il colore finale del gradiente (preimpostato a bianco) ad un giallo scuro che ci aggrada come nell'esempio seguente.
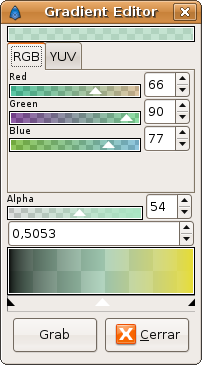
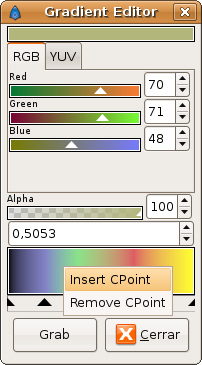
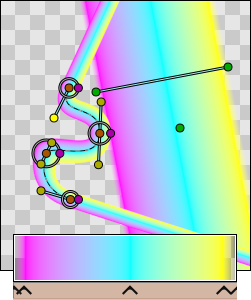
Gradients are not limited to two colors; you can have as many colors as you want in the gradient. To do that you just need to right click into the gradient preview and select "Insert CPoint". With this you'll insert a new triangle in the place where you made the right click. Then you can edit that color with the color and alpha sliders and create a tricolor gradient.
 |
|
Here I've created some sort of transparent light cyan for the central color.
Another cool feature is that you can slide the triangles just like you slide the color or alpha bars. With this you can compress the gradient to one or to other side or make its falling more quick or slow between colors. If you press SHIFT key meanwhile the CPoint is being dragged it doesn't pass the closest CPpoint it finds so it makes easier to stack CPoints one over other. CPoints can be moved more precisely by editing the numerical field just about the gradient's preview. This is a number between 0 (left edge) and 1 (right edge) specifying the selected CPoint's position.

Finally the "Grab" button copies the edited gradient into the toolbox's default gradient.
Constraining a gradient:
By default gradient layers overwrite or flood their surroundings. The area before the beginning of the gradient and after the end of the gradient are flooded with the beginning and ending colors of the gradient. As can be seen in this image:
This is by design and adds the greatest flexibility to gradient layers. To achieve a gradient which is limited by its own geometry begin and end the gradient with transparency. Such as this:
This still floods the surroundings, but with a transparent flood. To create a sharp edge to the gradient the beginning and ending colors can be dragged to the ends of the gradient editor gadget. The transparency doesn't have to have any width, it just has to be defined as the beginning and the end. Or just the beginning, or just the end, it's up to you, and your situation.