Difference between revisions of "Dev:IDE Windows"
(Creation of the page, install of Git, Clone the code) |
(Add a note about OpenGL support currently broken) |
||
| (6 intermediate revisions by the same user not shown) | |||
| Line 5: | Line 5: | ||
== Install GIT, other tools and clone the code == | == Install GIT, other tools and clone the code == | ||
{{Note|Clone the code my dear|This assume you read the section {{l|Dev:Source_code|"Clone the code from git"}} }} | {{Note|Clone the code my dear|This assume you read the section {{l|Dev:Source_code|"Clone the code from git"}} }} | ||
| + | {{Note|OpenGL support currently broken|'''OpenGL support is currently broken''' and the compilation of ''synfig-core will crash'' unless you compile it with '''--without-opengl'''. See [[http://www.synfig.org/forums/viewtopic.php?p=32060#p32053 this forums post]] for more details. (you can also modify synfig-core's configure.ac in the section --with-open which is active by default)}} | ||
Before to setup any IDE, you will have to prepare the synfig-build environment under Windows. | Before to setup any IDE, you will have to prepare the synfig-build environment under Windows. | ||
| Line 47: | Line 48: | ||
If you already installed Git, you can skip this section. | If you already installed Git, you can skip this section. | ||
| − | Visit the original website | + | Visit the original website https://git-for-windows.github.io/ and click on the big download button. If you don't see it, go and see an ophthalmologist :P<br /> |
You will be redirected on the GitHub page with the last version, offered as 32 and 64bit. | You will be redirected on the GitHub page with the last version, offered as 32 and 64bit. | ||
| Line 90: | Line 91: | ||
Start Git Bash as Administrator and type exactly all the following commands at the prompt.<br /> | Start Git Bash as Administrator and type exactly all the following commands at the prompt.<br /> | ||
| − | If you don't, you will notice it soon! | + | You can also paste in the Git Bash window with ''alt-space, modify, paste''<br /> |
| + | If you don't, you will notice it soon!<br /> | ||
| + | ''With Git 2.5.0 I had an error with "mkdir C:\synfig-build" so I changed it to "mkdir /c/synfig-build"'' | ||
<pre> | <pre> | ||
| − | mkdir | + | mkdir /c/synfig-build |
cd C:\synfig-build | cd C:\synfig-build | ||
git clone https://github.com/synfig/synfig.git | git clone https://github.com/synfig/synfig.git | ||
| Line 101: | Line 104: | ||
exit | exit | ||
</pre> | </pre> | ||
| + | |||
| + | === Download and install Cygwin === | ||
| + | |||
| + | Download Cygwin setup binary (http://www.cygwin.com/).<br /> | ||
| + | Save it into ''C:\synfig-build\cygwin-dist\'' directory. | ||
| + | |||
| + | Run Cygwin setup (with administrator rights) and install with the default parameters.<br /> | ||
| + | It should be intalled in ''C:\cygwin''. | ||
| + | |||
| + | === Download and install NSIS === | ||
| + | |||
| + | Download and install NSIS '''''>=3.0''''' (http://nsis.sourceforge.net/).<br /> | ||
| + | Don't use ''2.46'', it will fail!<br /> | ||
| + | Install it full into ''C:\synfig-build\NSIS\'' directory. | ||
| + | |||
| + | === You plan to build 64-bit version? You need 7zip === | ||
| + | For the 64-bit build only! | ||
| + | Download and install 7zip (''http://downloads.sourceforge.net/sevenzip/7z920-x64.msi'').<br /> | ||
| + | Install into ''C:\synfig-build\7zip\'' directory. | ||
| + | |||
| + | === First build ! === | ||
| + | Be aware that it was downloading components and compiling during more than 2 hours for me.<br /> | ||
| + | It depends on you bandwith, the speed of your computer and hard disk type!<br /> | ||
| + | But it should be only for this first build if you follow it carefully :)<br /> | ||
| + | Sometimes it will looks stalled but you can check in your Task Manager if there are some sh/bash executable running.<br /> | ||
| + | So let it run ! | ||
| + | |||
| + | Open Cygwin console (with administrator privileges) and run the build script:<br /> | ||
| + | <pre>bash C:/synfig-build/synfig/autobuild/synfigstudio-cygwin-mingw-build.sh</pre> | ||
| + | |||
| + | You can go and take a coffee (or a cocoa, depending on your age ;) )<br /> | ||
| + | Installation bundle will be written to ''C:\synfig-build\'' | ||
| + | |||
| + | == Netbeans from Windows == | ||
| + | |||
| + | (Tested with Netbeans 8.0.2)<br /> | ||
| + | [https://netbeans.org/ What Netbeans is?]<br /> | ||
| + | Done following the [https://www.youtube.com/watch?v=kR7MKXAYCww video tutorial made by Konstantin Dmitriev (in russian ;))] and adapted for Windows/Cygwin.<br /> | ||
| + | Assuming the source will be installed in C:\synfig-build\synfig\ as expected.<br /> | ||
| + | |||
| + | === Prepare your Build Tools === | ||
| + | |||
| + | You have to use a specific Build Tool Collection in your project.<br /> | ||
| + | Go in the menu ''Tools'' / ''Options'' / ''C/C++'' / ''Build Tools''<br /> | ||
| + | Press ''Add'' (down-left).<br /> | ||
| + | Enter ''C:\cygwin\bin'' as '''Base Directory''', ''GNU 4.x Cygwin'' as '''Tool Collection Family''', and ''Cygwin_4.x'' as '''Tool Collection Name'''.<br /> | ||
| + | |||
| + | [[File:NB-Win-AddNewTool.png]]<br /> | ||
| + | |||
| + | As a result, you should have the resulting information in the form:<br /> | ||
| + | |||
| + | [[File:NB-Win-Build-Tools-Options.png]] | ||
| + | |||
| + | Press Ok.<br /> | ||
| + | Now we are ready to setup the projects! | ||
| + | |||
| + | === Import synfig (etl / core / studio) projects in Netbeans === | ||
| + | * Open Netbeans (if not done yet) | ||
| + | * Open File/New Project.... | ||
| + | |||
| + | <table border="1"> | ||
| + | <tr><td> | ||
| + | 1. Choose Project<br /> | ||
| + | * Choose {{Literal|C/C++ Project}} under {{Literal|Categories}},<br /> | ||
| + | * Choose {{Literal|C/C++ Project with Existing Sources}}<br /> | ||
| + | </td><td>[[File:NB-Win-01.png]]</td> | ||
| + | </tr> | ||
| + | |||
| + | <tr><td> | ||
| + | * 2. Select Mode<br /> | ||
| + | {| class="wikitable" | ||
| + | |- | ||
| + | |Source folder||c:\synfig-build\synfig | ||
| + | |- | ||
| + | |Build Host||localhost | ||
| + | |- | ||
| + | |Tools Collection||Cygwin 4.x (GNU 4.x Cygwin) | ||
| + | |- | ||
| + | |Configuration Mode||Custom | ||
| + | |}</td> | ||
| + | <td>[[File:NB-Win-02.png]]</td> | ||
| + | </tr> | ||
| + | |||
| + | <tr><td> | ||
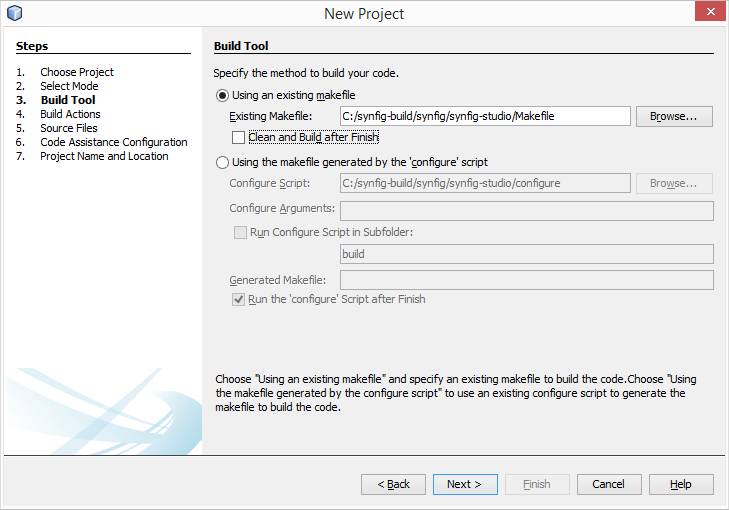
| + | 3. Build Tool<br /> | ||
| + | * Using an existing makefile<br /> | ||
| + | {{Literal|c:/synfig-build/synfig/synfig-studio/Makefile}} | ||
| + | * Uncheck {{Literal|Clean and Build after Finish}} | ||
| + | </td> | ||
| + | <td>[[File:NB-Win-03.png]]</td> | ||
| + | </tr> | ||
| + | |||
| + | <tr> | ||
| + | <td> | ||
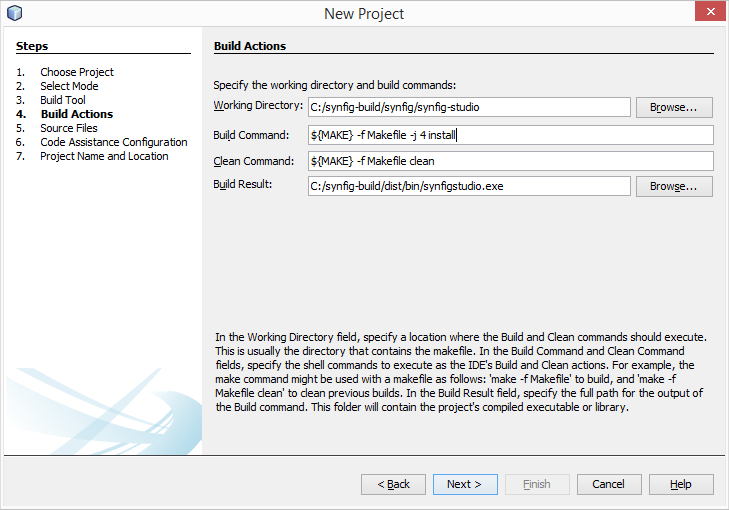
| + | 4. Build Action<br /> | ||
| + | {| class="wikitable" | ||
| + | |- | ||
| + | |Working Directory||{{Literal|c:/synfig-build/synfig/synfig-studio}} | ||
| + | |- | ||
| + | |Build Command||{{Literal|${MAKE} -f Makefile -j 4 install}} | ||
| + | |- | ||
| + | |Clean Command||{{Literal|${MAKE} -f Makefile clean}} | ||
| + | |- | ||
| + | |Build Result||{{Literal|c:/synfig-build/dist/bin/synfigstudio.exe}} | ||
| + | |} | ||
| + | </td> | ||
| + | <td>[[File:NB-Win-04.png]]</td> | ||
| + | </tr> | ||
| + | |||
| + | <tr> | ||
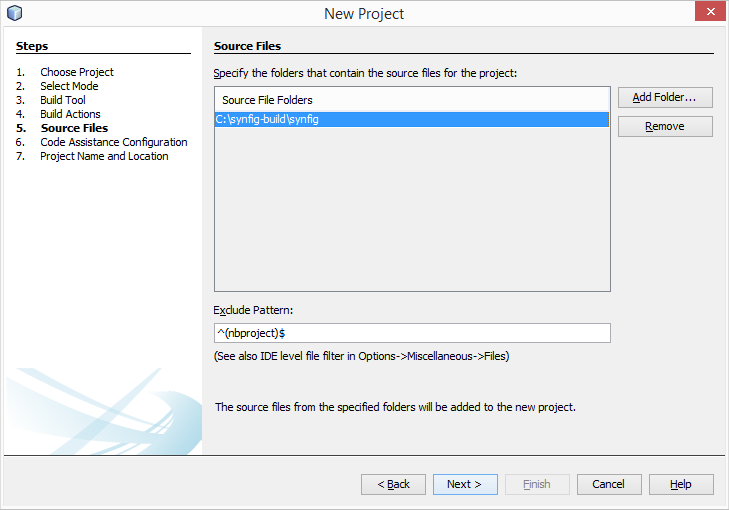
| + | <td>5. Source Files<br /> | ||
| + | * Add {{Literal|c:\synfig-build\synfig}} | ||
| + | </td> | ||
| + | <td>[[File:NB-Win-05.png]]</td> | ||
| + | </tr> | ||
| + | |||
| + | <tr> | ||
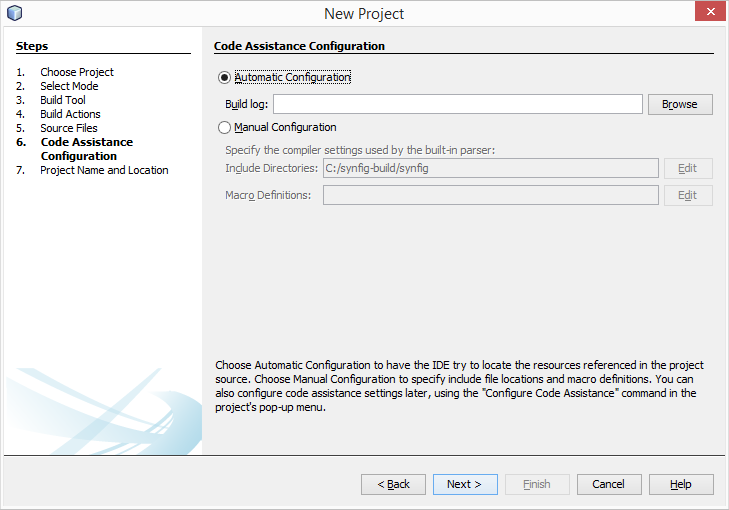
| + | <td>6. Code Assistance Configuration<br /> | ||
| + | * Choose {{Literal|Automatic Configuration}} | ||
| + | </td> | ||
| + | <td>[[File:NB-Win-06.png]]</td> | ||
| + | </tr> | ||
| + | |||
| + | <tr> | ||
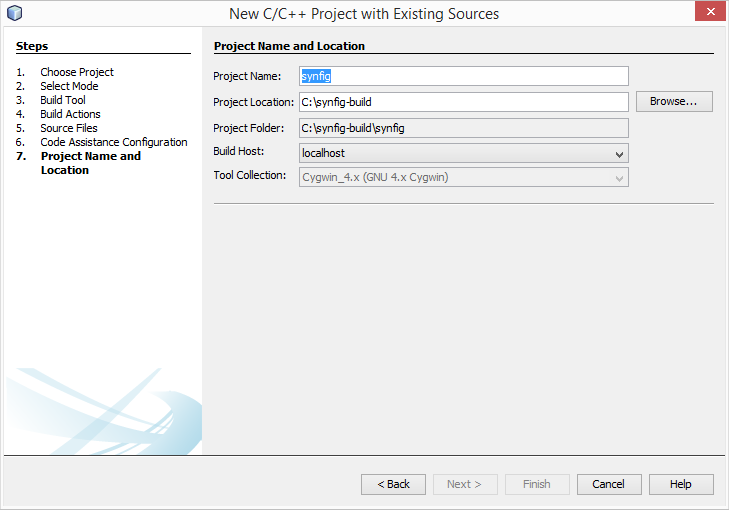
| + | <td>7. Project Name and Location <br /> | ||
| + | {| class="wikitable" | ||
| + | |- | ||
| + | |Project Name||{{Literal|synfig}} | ||
| + | |- | ||
| + | |Project Location||{{Literal|c:\synfig-build}} | ||
| + | |- | ||
| + | |Project Folder||{{Literal|c:\synfig-build\synfig}} | ||
| + | |- | ||
| + | |Build Host||{{Literal|localhost}} | ||
| + | |- | ||
| + | |Tool Collection||{{Literal|Cygwin_4.x (GNU 4.x Cygwin)}} | ||
| + | |} | ||
| + | </td> | ||
| + | <td>[[File:NB-Win-07.png]]</td> | ||
| + | </tr> | ||
| + | </table> | ||
| + | * Press {{Literal|Finish}} | ||
| + | * Wait a minute ... project loaded ! | ||
| + | ''You are now able to build from Netbeans.'' | ||
Latest revision as of 19:39, 20 July 2016
Contents
Want to setup an IDE to debug / develop synfig ? (under Windows)
Here, we will not discuss of witch IDE is better or if real hacker do all with vi/emacs
Install GIT, other tools and clone the code
|
Clone the code my dear This assume you read the section "Clone the code from git"
|
|
OpenGL support currently broken OpenGL support is currently broken and the compilation of synfig-core will crash unless you compile it with --without-opengl. See [this forums post] for more details. (you can also modify synfig-core's configure.ac in the section --with-open which is active by default)
|
Before to setup any IDE, you will have to prepare the synfig-build environment under Windows.
It requires administrator rights.
Here is the original "Usage notes" from synfigstudio-cygwin-mingw-build.sh (by Konstantin Dmitriev). We will follow it step-by-step!
# * Download and install Git (http://msysgit.github.io/).
# * Open Git Bash and execute following commands:
# ** mkdir C:\synfig-build
# ** cd C:\synfig-build
# ** git clone https://github.com/synfig/synfig.git
# ** mkdir cygwin-dist
# ** cd synfig
# ** git config --global core.autocrlf input
# ** exit
# * Download Cygwin setup binary (http://www.cygwin.com/) and save it into C:\synfig-build\cygwin-dist\ directory.
# * Run Cygwin setup and install with the default parameters.
# * Download and install NSIS >=3.0 (http://nsis.sourceforge.net/). Install into C:\synfig-build\NSIS\ directory.
# * (64-bit build only!) Download and install 7zip (http://downloads.sourceforge.net/sevenzip/7z920-x64.msi). Install into C:\synfig-build\7zip\ directory.
# * Open Cygwin console (with administrator previlegies) and run the build script:
# ** bash C:/synfig-build/synfig/autobuild/synfigstudio-cygwin-mingw-build.sh
# * Installation bundle will be written to C:\synfig-build\
#
#
# = Other notes =
# * Builds from current repository, current revision. So you should manually checkout the desired revision to build
# * Executing script without arguments makes a full clean build and produces installer package
# * You can pass arguments to the script to invoke particular stage.
#	Available stages: mkprep, mketl, mksynfig, mksynfigstudio, mkpackage
#	Example:
#		synfigstudio-cygwin-mingw-build.sh mkpackage
# * You can pass a custom command to be invoked in the build environment.
#	Example (executes make with respect to the build environment):
#		synfigstudio-cygwin-mingw-build.sh make -j2
|
Warning! Your attention please! Be aware that the lines with ** have to be executed in Git Bash. If you don't, you will meet some nasty side-effects during the first build and you may lose your sanity!
|
Download and install Git
If you already installed Git, you can skip this section.
Visit the original website https://git-for-windows.github.io/ and click on the big download button. If you don't see it, go and see an ophthalmologist :P
You will be redirected on the GitHub page with the last version, offered as 32 and 64bit.
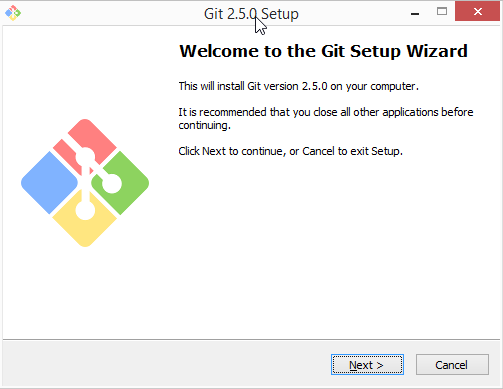
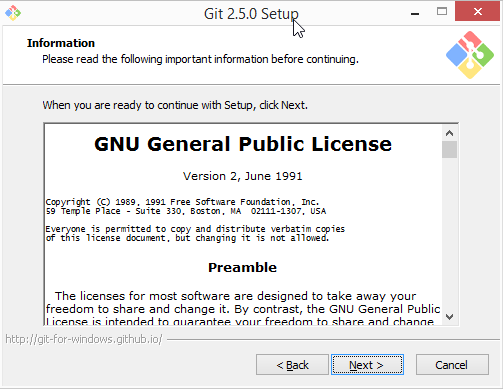
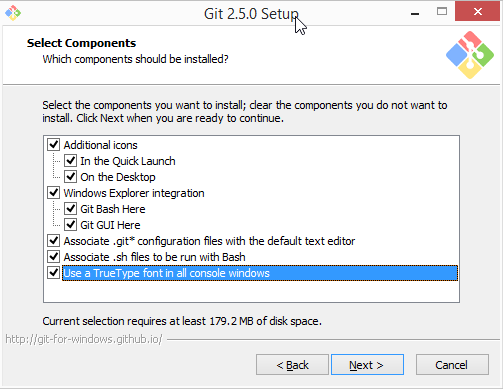
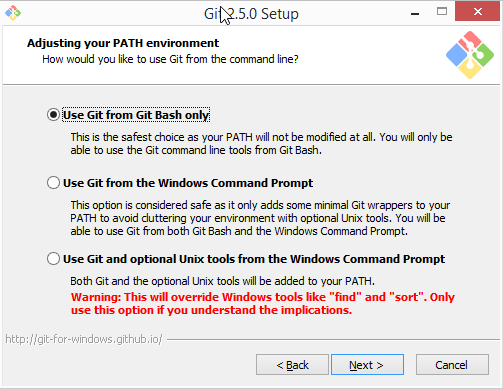
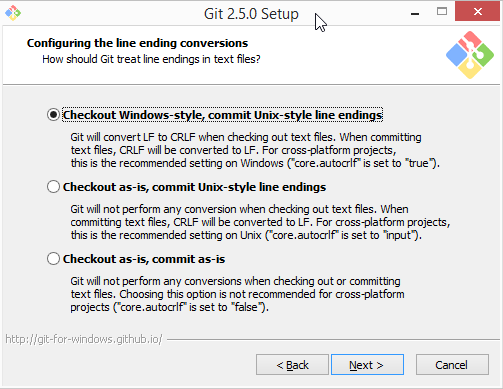
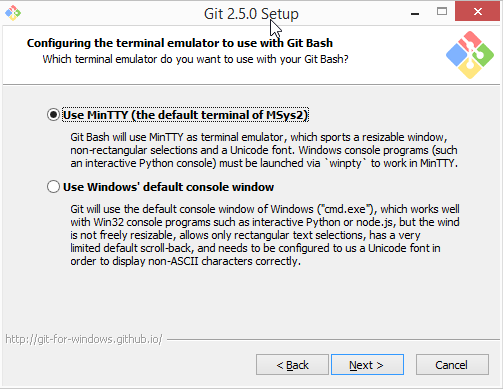
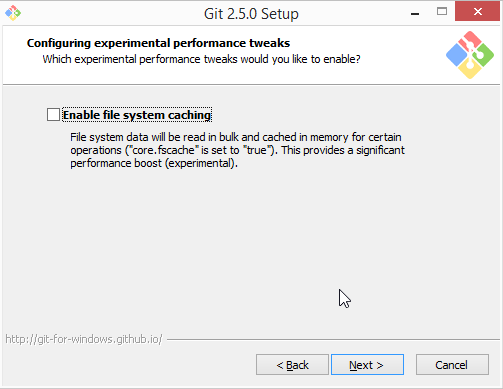
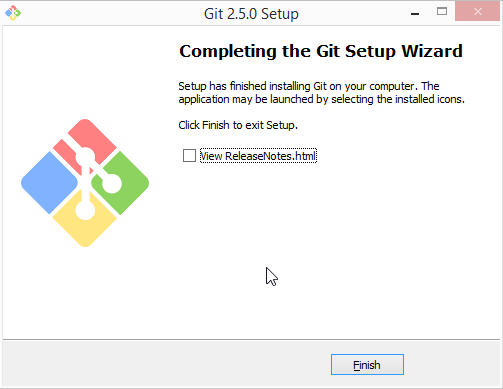
You will install it with (most of) the default values, like on the screenshots below (featuring my mouse cursor as a Guest Star).
Clone the Code
Start Git Bash as Administrator and type exactly all the following commands at the prompt.
You can also paste in the Git Bash window with alt-space, modify, paste
If you don't, you will notice it soon!
With Git 2.5.0 I had an error with "mkdir C:\synfig-build" so I changed it to "mkdir /c/synfig-build"
mkdir /c/synfig-build
cd C:\synfig-build
git clone https://github.com/synfig/synfig.git
mkdir cygwin-dist
cd synfig
git config --global core.autocrlf input
exit
Download and install Cygwin
Download Cygwin setup binary (http://www.cygwin.com/).
Save it into C:\synfig-build\cygwin-dist\ directory.
Run Cygwin setup (with administrator rights) and install with the default parameters.
It should be intalled in C:\cygwin.
Download and install NSIS
Download and install NSIS >=3.0 (http://nsis.sourceforge.net/).
Don't use 2.46, it will fail!
Install it full into C:\synfig-build\NSIS\ directory.
You plan to build 64-bit version? You need 7zip
For the 64-bit build only!
Download and install 7zip (http://downloads.sourceforge.net/sevenzip/7z920-x64.msi).
Install into C:\synfig-build\7zip\ directory.
First build !
Be aware that it was downloading components and compiling during more than 2 hours for me.
It depends on you bandwith, the speed of your computer and hard disk type!
But it should be only for this first build if you follow it carefully :)
Sometimes it will looks stalled but you can check in your Task Manager if there are some sh/bash executable running.
So let it run !
Open Cygwin console (with administrator privileges) and run the build script:
bash C:/synfig-build/synfig/autobuild/synfigstudio-cygwin-mingw-build.sh
You can go and take a coffee (or a cocoa, depending on your age ;) )
Installation bundle will be written to C:\synfig-build\
Netbeans from Windows
(Tested with Netbeans 8.0.2)
What Netbeans is?
Done following the video tutorial made by Konstantin Dmitriev (in russian ;)) and adapted for Windows/Cygwin.
Assuming the source will be installed in C:\synfig-build\synfig\ as expected.
Prepare your Build Tools
You have to use a specific Build Tool Collection in your project.
Go in the menu Tools / Options / C/C++ / Build Tools
Press Add (down-left).
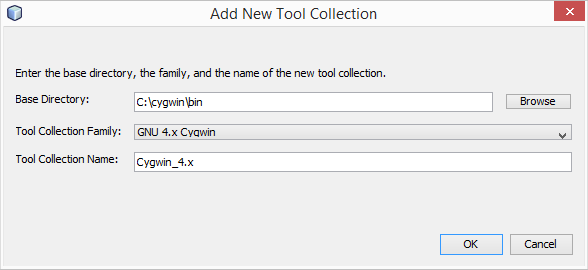
Enter C:\cygwin\bin as Base Directory, GNU 4.x Cygwin as Tool Collection Family, and Cygwin_4.x as Tool Collection Name.
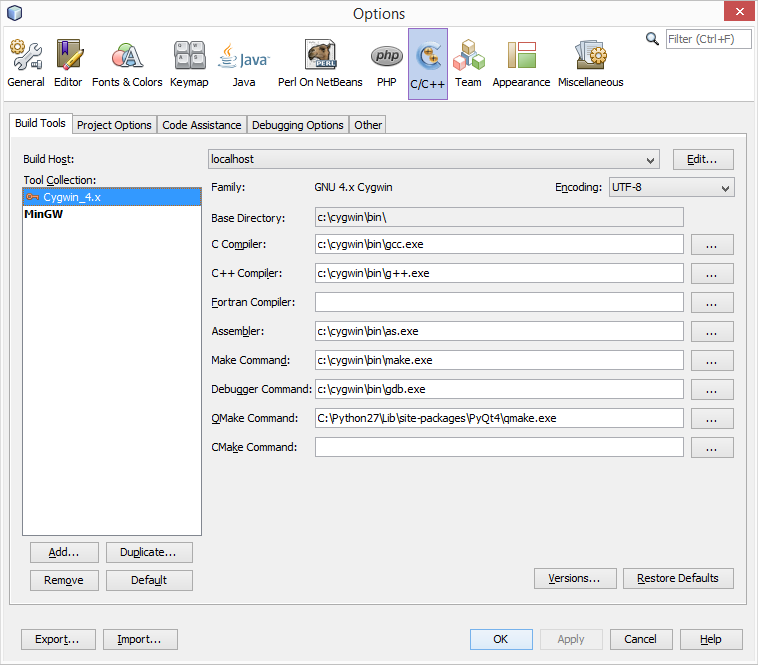
As a result, you should have the resulting information in the form:
Press Ok.
Now we are ready to setup the projects!
Import synfig (etl / core / studio) projects in Netbeans
- Open Netbeans (if not done yet)
- Open File/New Project....
- Press "Finish"
- Wait a minute ... project loaded !
You are now able to build from Netbeans.

