Adding Layers
| Language: |
English • Deutsch • español • suomi • français • italiano • Nederlands • português • română • русский • 中文(中国大陆) |
Contents
Introduction
Dans le cour précédent, vous avez fait votre première animation en changent les attributs de vos primitives d'objets, comme la position, la couleur ou la taille. Ces techniques simples sont, toutefois, insuffisantes pour réaliser des animations perfectionnés d'objets ou de personnages. Pour faire cela, Synfig utilise les calques. Comme dans d'autres logiciels de dessin, ils sont utilisés pour séparer les différents éléments d'une image.
Cependant, les calques de Synfig sont différents des calques des autres logiciels sur, au mois, trois points:
- Chaque objets, éléments et effets ont leurs propres calques.
- Vous pouvez organiser les calques par groupe hiérarchiques.
- Vous pouvez utiliser les calques supérieurs pour modifier le comportement ou (l'aspect) des calques qui se trouvent en dessous.
Comme vous pouvez le voir, les calques sont un aspect très important de Synfig, Probablement beaucoup plus que dans la plupart des programmes graphiques. La compréhension du fonctionnement des calques représente une part importante de l'apprentissage de synfig.
Combiner les calques
Maintenant, regardons un exemple simple de la manière de combiner deux calques pour créer un effet dégradé sur un rectangle.
Créez un nouveau fichier d'animation d'une durée égale à zéro. Il n'y a pas de nécessitée d'utiliser la timeline pour l'instant. Puis dessinez un rectangle en utilisant l'outil rectangle.
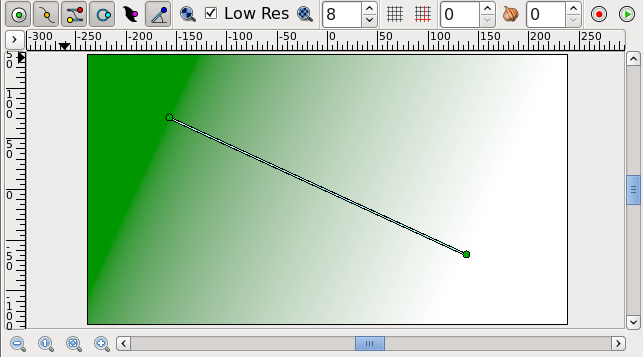
Sélectionnez l'outil dégradé dans la Boite à outils. Pressez le bouton gauche de la sourie sur le canevas. Tirez dans la direction désirée du dégradé et relâchez à l'endroit voulu. Vous remarquerez qu'un nouveau dégradé à été ajouté dans le Panneau Calques appelé Gradient. Rien d'étonnant.
Pick the Gradient Tool from the Toolbox, press the left mouse button on the canvas, drag to change the gradient direction and release the button when you are done. You should note that another layer was added in the Panneau Calques called Gradient. This is nothing special.
|
Note If you see no gradient but just a plain color, that means that you probably just clicked on the canvas without dragging your mouse. To fix that pick the Transform Tool, click into the canvas to activate the gradient's ducks. You need to grab the one you see and move it a bit until a gradient appears.
|
You now have a gradient, but it is not what you wanted: it spreads across the whole canvas. The goal was to have a gradient in the rectangle. So, let's fix this now.
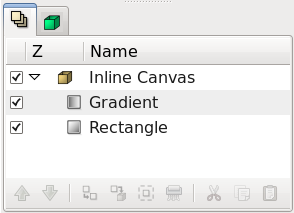
In the Panneau Calques, select both the gradient and the rectangle layer. Then, right-click and select "Encapsulate" from the menu. The view of your Layers Panel should change now, showing a small box called Inline Canvas with an arrow in front. By clicking on the arrow you can expand the inline canvas to see its contents, your previous two layers: the gradient and the rectangle.
You can treat this layer like any other layer — move it around, duplicate it, copy and paste it. If you want to change the name of it to something more descriptive, just select the layer in the layer tab and click on its label. Then you just edit it in place. You can do this for ANY layer, and are strongly encouraged to do so.
Using locality
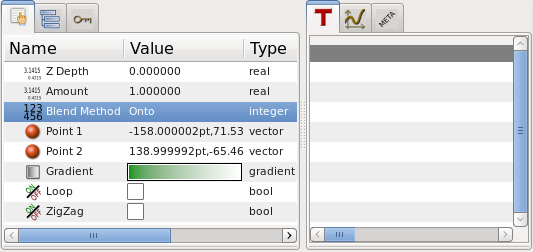
However, there is still a problem: the gradient still covers the whole canvas although we wanted it to be restricted on the rectangle. To do so, activate the gradient layer in the Layers Panel. Now go to the Params Panel/fr (by default it resides in the bottom window), and search for the attribute called "Blend Method". Double-click the entry and select "Onto" from the drop-down menu.
The gradient should now be restricted to the rectangle. Congratulations! You just made your first effect by interacting layers with Synfig.
If only for the additional organization, encapsulating layers into inline canvases dramatically improves the ease of use of Synfig Studio. But lots of programs can do this. The concept of scope as just demonstrated sets Synfig apart from other programs with layer hierarchies. The key point is that a layer can only modify the data that it gets from directly below it. In other words, if you were to throw a Calque Flou on top of the layers inside the inline canvas we created, it would just blur them — anything under the inline canvas would not be blurred! Let's try it.
Using layers to modify other layers
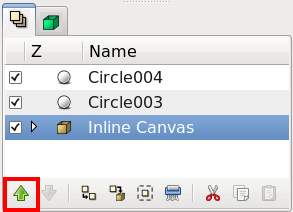
Make sure you have the Inline Canvas layer selected and create two red circles. They will appear on top of the Inline Canvas. Select the Inline Canvas layer and use the "Raise Layer" button in the Layers Panel to place it on top of the circles.
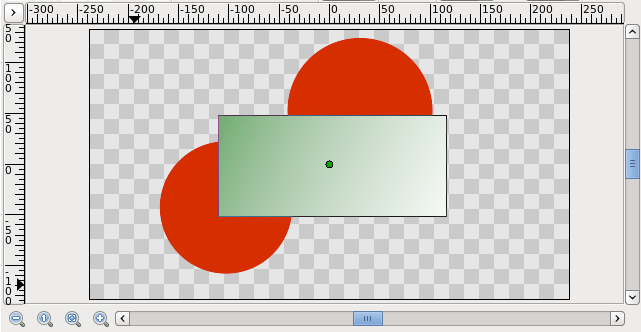
Now our inline canvas layer (with rectangle and gradient) is in front of those two circles.
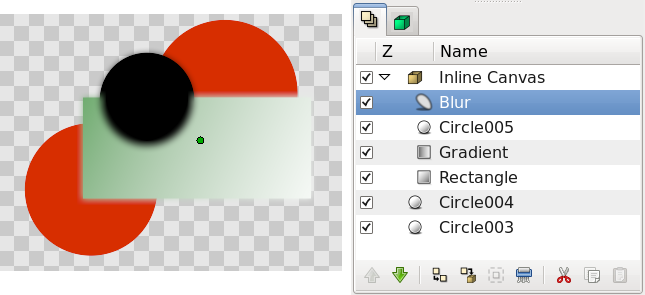
Expand the inline canvas to show its contents, and select the top layer inside of it (should be the gradient layer). This is where we want to insert the new layer. Create another circle filled with a black color. The black circle layer will be created over the gradient layer inside the inline canvas.
Now, right click on the black circle layer in the Layers Panel and a popup menu will appear. The first item in that popup is "New Layer". Inside of the "New Layer" menu, you'll see several categories of layers you could create, but what we want is a blur, so go to the Blurs category and select the "Blur" layer (so that would be "New Layer → Blurs → Blur").
Well, it blurred... but something is not quite right — the outside edge of the contents of the inline canvas is still sharp. It is doing this because the blend method of the blur defaulted to "Composite" (you can change the default blend method for new layers from the Paramètres par Défaut pour les Nouveaux Calques section of the Toolbox). What we want is a blend method of "Straight". Just select the blur layer, and change the Blend Method to "Straight" in the Params Panel.
|
Note In the Synfig version "0.62.02", the blend method for newly created blur layers is "Straight" if the default blend method in the Toolbox is set to "By Layer Default".
|
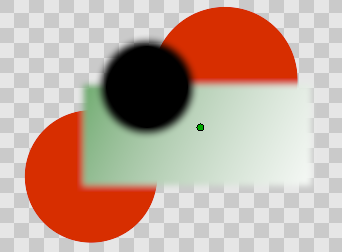
Ok, now we have all of the contents of the inline canvas blurred, but everything under it is sharp!
Digging further...
If you care to look into Synfig's main menu under "Layer → New Layer" you will note quite a lot of different possibilities for making layers. Several of them sound rather unusual, like "Transform → Rotate" for example. You can use this to add new attributes to your objects. And just like other, basic attributes in the previous animation tutorial, you can change them to be different on certain keyframes. Synfig will take care of interpolating the steps in between.
For example, you could create a shape and add a Calque Rotation over it. Combine this with the lesson learned in the last tutorial and you can create a rotating effect. This technique is used for creation of Cut-out Animation.


