Groups Panel
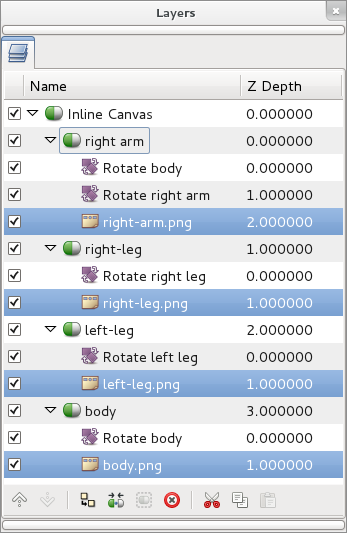
Suppose you have several shapes that you want to treat the same but they're scattered throughout your project, encapsulated on different layers. Rather than expanding each inline canvas and individually selecting them each time you want to edit them, you can use Groups. To add some layers to group select them in the Layers Panel, right click, and choose "Add to Group". It will prompt you for a Group name. Type a name for a new, or existing group and click "OK".
Now you can select that group and animate all those layers together (for instance, change all their amounts, or move their origins).
Current interaction with groups and grouped layers in Groups Panel can be described in following terms:
- Double click over a Group icon selects all the grouped layers in the Layers Panel. It allows a multiple selection of scattered layers with just one double click. Notice that double click does not highlight the grouped layers in the Group Panel.
- Double click over a grouped layer icon selects that layer on the Layers Panel and unselects all others.
- Double click holding Ctrl key over a Group or a grouped layer icon adds the selection to the current one at the Layers Panel.
- Double click over group or layer name allows to rename.
- Clicking the checkbox on the left of layer icon will deactivate the layer in the Layers Panel.
- Clicking the checkbox near the group icon will deactivate all layers inside of this group.
- A layer in a group can be moved to any other group (empty or not).
- If the group is empty it can't be activated and won't be saved.
- Single left or right click over a Group makes it selected. You can use it to enable the "Remove Group" button.
- Single left click over a grouped layer selects the grouped layer. You can select multiple layers if you click holding Ctrl or ⇧ Shift key, but the effect on subsequent commands only affect the layer that you right-click on.
Single right click over a grouped layer pops up the context menu with the same elements as you have for each layer in the Layers Panel:
- "Select All Children": This menu entry appears only if the grouped layer is a paste canvas. The behavior is the same as in the Layers Panel - all layers inside of the Paste Canvas layer are selected.
- "Add Layers to Group": Displays a dialog to enter a Group name and moves the select layer to the new group. Only works for the layer below the cursor when multiple selection is done.
- "Remove Layers from a Group": Removes the selected layer from the group. Only one layer at a time can be removed. Even if multiple layers are selected only the layer below the cursor when right clicking is removed.
- "Duplicate layer": Works the same as duplicate layer from the Layers Panel and also add the duplicated layer to the current Group. It works partially because you cannot duplicate multiple layers as in the Layers Panel. It only acts over the layer you did the right click. The selection is ignored.
- "Encapsulate": It works the same as the Encapsulate Layers from the Layers Panel but only affects to the layer where the right click is done.
- "Remove Layer": It works the same as the Remove Layers from the Layers Panel but only affects to the layer where the right click is done.
- "Set Layer Description": Displays a dialog for renaming the layer.
- "Raise Layer / Lower Layer": Does the same than in the Layers Panel. It doesn't modify the position in the grouped layer in the Group but the position in the Layers Panel hierarchy is modified as expected.
Notice, that a layer can only belong to one Group at a time. Adding a layer to a Group when it's already in previous group will remove it from the previous group.
Groups can be nested. You can make nested groups one of the following ways:
- by adding a layer to a group with a name containing dot as separator: "parent.child"
- by dragging a group inside other group
The contents of the nested groups is selected when you double-click the parent group icon. Depending on what group level you click you can select more or less layers.
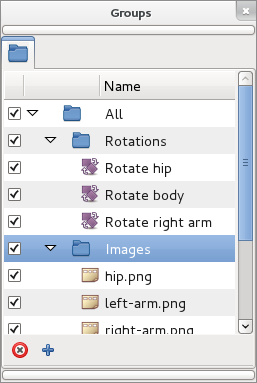
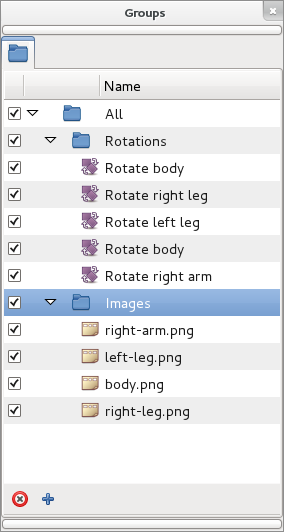
For example making a double click on the 'All' Group will select Rotations and Images grouped layers in once double click.
Regarding to the buttons:
- "Add New Group" button adds empty deactivated group.
- "Remove Group" button removes selected group. If the group contains other groups they are not recursively deleted, only the first child level of layers.
Also Groups scope is the current edited Canvas. That means that only the grouped layers that belong to the current Canvas being edited are show in the Group dialog. It also means that Groups are File/Canvas dependent. It means that a layer can only belong to a group defined in its exported canvas scope. For example: there are two canvases B is the root one and A is a pasted one inside B. Then a layer that belongs to exported canvas A can belong only to Groups defined at canvas A scope. Although you can select the layer from the outer root canvas (B) you cannot group it into any group defined at B scope. You can also have groups with same name in different file/canvas scope. If a layer is dragged out from a pasted canvas and it belongs to a group, the group name is dragged out also.
See the talk area for more info.
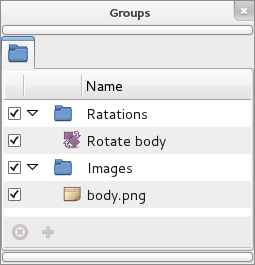
Here are shown some examples of what can be done using groups for a complex file:
| Samples | Groups | Effects after double click on the highlighted Group |
| Sample1 | ||
| Sample2 |


