Circle Tool
From Synfig Studio :: Documentation
Revision as of 12:23, 8 February 2016 by D.j.a.y (Talk | contribs) (→Options: update to v1.x + screenshot)
The "Circle Tool" is used for creating new circle layers. Click where you want the center of the circle to be, and drag to set the radius.
The "Circle tool" can also be used to create outline layers, region layers, curve gradient layers, and plant layers, each with approximately circular Splines.
Options
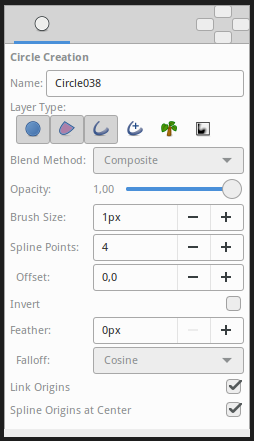
The Tool Options Panel allows you to specify:
- Name : Used for the new layer; any number in this field will automatically increment with each layer created
- Layer Type : Whether create Star Layer and/or Outline, Advanced Outline, Region, Plant and Curve Gradient layers (Splines)
- Blend Method : The blending method used to composite on the layers below
- Opacity : Sets the Amount for new layers. Defaults to 1.00 (Completely opaque)
- Brush Size : Sets the Outline width or the size of the gradient (only for Outline, Advanced Outline and Curve Gradient)
- Spline Points : Specify the number of Spline Points that will be used in the new Splines (for other than Circle Layer)
- Offset : Offset of the tangent of the Spline Points (for other than Circle Layer)
- Invert : Whether invert the create(d) layer(s)
- Feather : Width of the area to be dissolved at the edge (not for Plant and Curve Gradient)
- Falloff : Determines the falloff function for the feather (only for Circle Layer)
- Link Origins : Whether Link the Offset of Splines
- Spline Origins at Center : Set the origin of the layer at the center of the circle, else the center is set at the Canvas center
Usage
Click on the canvas where you want to have the center of the circle and drag to obtain the desired radius value, and release the mouse button when you are done.
