Brushes
(→A recent Release) |
(→The Idea) |
||
| Line 40: | Line 40: | ||
Legarea stricta la caracteristica Bline nu este necesara, dar ajuta la realizarea unor tipuri de conversii si legaturi. | Legarea stricta la caracteristica Bline nu este necesara, dar ajuta la realizarea unor tipuri de conversii si legaturi. | ||
| − | == | + | == Ideea == |
| − | + | Ideea pensulelor este de a folosi caracteristica stratului Duplicat cu o legatura la caracteristica Bline (automata sau manuala) data de tipurile de conversie. | |
| − | + | La legarea unui nod la o "bline" (sau o tangenta sau o latime - width), parametrul se va converti la urmatorii sub-parametri: | |
* bline "BLine" | * bline "BLine" | ||
| Line 50: | Line 50: | ||
* real "Amount" | * real "Amount" | ||
| − | + | Mai exista si alti parametri particulari pentru tangenta sau latime care vor fi descrisi in alte lectii. | |
| − | + | Bline "Bline" este linia Bezier de care este legat parametrul (vertex, tangenta sau latime). In cazul nodului aceasta inseamna ca nodul este legat de elementul bline dat de parametrul "Amount". Cand Amount are valoarea 0.0, pozitia nodului este la inceputul Bline. Cand Amount are valoarea 1.0, pozitia nodului este la sfarsitul Bline. Atunci cand Loop este "on", valorile care nu apartin domeniului [0.0, 1.0] sunt readuse fortat in acest domeniu prin eliminarea partii intregi numarului. <small><tt>(Deci valorile intregi - fara zecimale devin 0.0, iar la valorile cu zecimale se iau in considerare doar zecimalele)</tt></small> | |
| − | + | Pe de alta parte, stratul Duplicat permite randarea oricarui element care se afla sub acesta, de cate ori se indica cu parametrul Index. De asemenea, daca legati orice parametru la acel Index, acel parametru este modificat in functie de index inainte sa fie randat de mai multe ori cu stratul Duplicat. Permite aplicarea unor tipuri de transformare la straturi in acelasi timp cu duplicarea lor. | |
| − | + | Folosind combinarea acestor doua caracteristici (legare - Link la Bline si Duplicat), puteti obtine emularea unor pensule in Synfig. | |
== The procedure == | == The procedure == | ||
Revision as of 06:02, 28 April 2012
|
Warning! This page contains outdated information. The release of Synfig Studio 0.64.0 introduced new terminology and this translated page needs to be updated according to original English text. You can help updating this page - see instructions here. Thank you! |
Contents
Introducere
Liniile de contur pe care le puteti desena cu Synfig sunt realizate cu o pensula rotunjita. Pensula este definit[ de o raza pe care o puteti modifica din editorul de pensula. Aceasta lectie explica cum se realizeaza contururile din pensula care va pot imbunatati substantial lucrul cu acestea.
De ce este nevoie pentru a folosi pensulele?
Imaginea pentru pensula
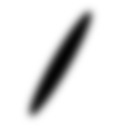
Deocamdata Synfig nu are incluse imagini pentru pensula, deci va fi nevoie sa le faceti sau sa le cautati in resursele gratuite.
Iata cateva exemple de pensule:
Aceste imagini sunt gratuite. Le puteti folosi in lucrarile dvs.
Imaginile pentru pensule pot fi orice fisier de tip imagine care permite transparenta (PNG, TIFF, GIF). Cu cat rezolutia imaginii este mai mare, cu atat marimea pensulei poate fi mai mare, fara pixelizare. Totusi, fisierele de dimensiuni foarte mari au nevoie de mai mult timp ca sa fie randate. Este de dorit sa alegeti calea de mijloc - un echilibru intre calitate si viteza de randare.
Oricum, in Synfig puteti folosi ca pensula orice este vizibil. Vedeti exemplele de mai jos.
O varianta recenta
In Synfig, pensulele pot fi obtinute prin combinarea urmatoarelor caracteristici:
- Duplicare strat - Duplicate Layer care implica o revizuire SVN >= 1358
- Legatura la Bline (care foloseste urmatoarele tipuri de convertire):
- Bline Vertex, care implica o revizuire SVN >= 774
- Bline Tangent, care implica o revizuire SVN >= 1863
- Bline Width, care implica o revizuire SVN >= 1872
Legarea stricta la caracteristica Bline nu este necesara, dar ajuta la realizarea unor tipuri de conversii si legaturi.
Ideea
Ideea pensulelor este de a folosi caracteristica stratului Duplicat cu o legatura la caracteristica Bline (automata sau manuala) data de tipurile de conversie.
La legarea unui nod la o "bline" (sau o tangenta sau o latime - width), parametrul se va converti la urmatorii sub-parametri:
- bline "BLine"
- bool "Loop"
- real "Amount"
Mai exista si alti parametri particulari pentru tangenta sau latime care vor fi descrisi in alte lectii.
Bline "Bline" este linia Bezier de care este legat parametrul (vertex, tangenta sau latime). In cazul nodului aceasta inseamna ca nodul este legat de elementul bline dat de parametrul "Amount". Cand Amount are valoarea 0.0, pozitia nodului este la inceputul Bline. Cand Amount are valoarea 1.0, pozitia nodului este la sfarsitul Bline. Atunci cand Loop este "on", valorile care nu apartin domeniului [0.0, 1.0] sunt readuse fortat in acest domeniu prin eliminarea partii intregi numarului. (Deci valorile intregi - fara zecimale devin 0.0, iar la valorile cu zecimale se iau in considerare doar zecimalele)
Pe de alta parte, stratul Duplicat permite randarea oricarui element care se afla sub acesta, de cate ori se indica cu parametrul Index. De asemenea, daca legati orice parametru la acel Index, acel parametru este modificat in functie de index inainte sa fie randat de mai multe ori cu stratul Duplicat. Permite aplicarea unor tipuri de transformare la straturi in acelasi timp cu duplicarea lor.
Folosind combinarea acestor doua caracteristici (legare - Link la Bline si Duplicat), puteti obtine emularea unor pensule in Synfig.
The procedure
It is supposed you already have an outline wher you would like to apply the brush. If not available create it now.
These are the steps you need to follow:
- If it's not already done, create an outline. That will be the outline followed by the brush.
- Caret Menu->File->Import. Select your image file for the brush.
You can also use an existing layer to do that, even a canvas with an animation inside. It doesn't matter what you use as brush, the procedure is always the same. - Create a Rotate layer onto the brush layer.
- Create a Zoom layer onto the Rotate layer.
- Select Zoom, Rotate and your brush layer and encapsulate them. It would produce a Paste/Inline Canvas Layer (let's call it Paste "A").
- Select Paste A and also select your outline layer.
Click on the Paste A Origin duck -the green dot- (beware that it can be below the Origin of the outline layer -both at (0,0) by default-) and right-click on the outline (avoid any duck). Select the "Link to Bline" option. - Repeat the above step but do it with the (blue) angle duck of the Rotate layer instead of the Origin of Paste A. It doesn't matter if you make right click on the same place of the outline bline or not. Later it will be fixed.
- Repeat the same but with the Amount parameter of the Zoom layer.
As the Amount parameter of the zoom layer has not visual interface (hasn't any duck associated) you have to export this parameter (right click export) and then select it from the Child panel. Then you can make the right click and Link to Bline operations. - Add a Duplicate Layer over Paste A. Encalsulate both, so the Duplicate layer affects only the Paste A layer.
It would produce a Child parameter (probably called "Index1" if that's your first Duplicate layer). Select that Index parameter from the Child Panel. - Now go to the Paste canvas layer (Paste "A"). Search for the Origin parameter (that now is a converted type) and expand it. Look for the Amount parameter. This parameter should have a value between 0.0 and 1.0 depending on where did you made click to the outline. Make right click over it and select Convert->Scale. Expand it again and select the "Link" parameter (it should be a Real) and make right click and select "Connect". It would connect the Link parameter to the Index parameter (already selected from the child panel). The default values for Index parameter is to duplicate from 1.0 to 3.0 so a this moment the duplicated brushes images are all placed at the end of the outline bline because all they have a value bigger or equal than 1.0.
- Repeat the same procedure for the Amount sub-parameter of the Angle parameter of the Rotate layer and the Amount sub-parameter of the Amount parameter of the Zoom layer.
- It is the time of spread the position of the duplicated brushes along the bline. To do that you have to properly scale the Amount sub-parameter of each converted to Link to Bline parameter. Go to the Paste Canvas Layer and expand the Origin parameter. Expand the Amount sub-parameter (already converted to a Scale) and look to the "Scale" parameter. This paramter has a default value of 1.0. Make right click over it and select Convert->Reciprocal. It would produce two sub-parameter more: Link, Epsilon and Infinite. Leave Epsilon and Infinite as they are and modify the Link one to be 3.0. Voila! the brush is spread along the BLine!
- Now export the Link sub-parameter (that you have just modified) by right click and "Export". Give a meaning name (for example "b-amount")
- Go to the child panel and select the just exported one.
- Without leaving the Origin parameter search for the following sub-parameter: Origin(BLine Origin)->Amount(Scale)->Link(Duplicate)->To. This parameter is the end of the loop of the Duplicate layer. Select it and make right click. As well as the exported b-amount is selected you can select Link from the context menu. It would make the Duplicate layer repeat it as many times says the b-amount value. By going to the Child Panel and changing the "b-amount" parameter to a high value (for example 100) make the brush to fill all the bline. Do you get the idea?
- Repeat the same procedure to the following parameters of the following layers (keep in mind that the "b-amount" parameter from the child list panel still selected):
- Rotate Layer->Amount(Bline Angle)->Amount(Scale)->Link(Duplicate)->To. Select it and right click "Link".
- Zoom Layer->Amount(Bline Width)->Amount(Scale)->Link(Duplicate)->To. Select it and right click "Link".
You can make the outline layer invisible (by un-checking the visibility check box) to only render the brushed one.
It only rest to make some modifications to the Outline width and the ouline shape to modify the brushed one accordingly.
Also you would like to not link the rotation to the bline to achieve a constant angled pen. It is up to you to use one or other feature.
There is a problem with the Zoom option. The zoom is an exponential value and the width is a linear one. It means that Zoom = 0 is current size, negative values means zoom out and positive values means zoom in. To link properly the width to the zoom we need a logarithmic convert type that is not available at the moment. So to solve that you have to make the Zoom parameter of the Paste canvas layer to be a negative value (between -3 and -5 are good values for normal brush sizes) and then let the Zoom Layer do its work. There is not fixed rule for this interim solution.
Further steps
It is possible to make more funcy things with this procedure like make random angled brushes or random spreaded brushes stamps along the outline. But this is part of an Advanced uses of Brushes tutorial.
Examples
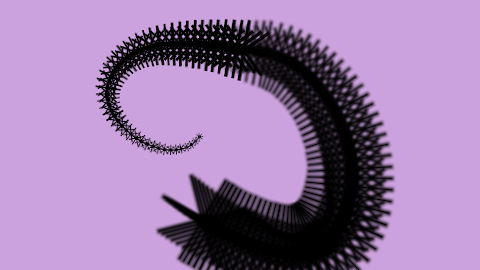
A Star layer. You can see that seems to be a bug there with the feather and zoom in and out combinations.
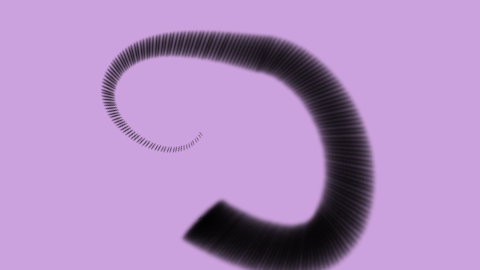
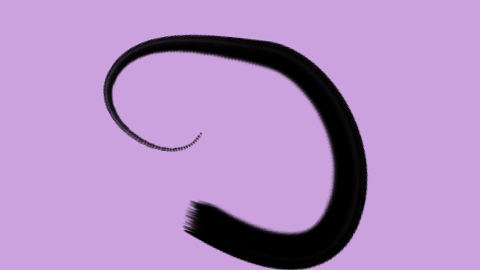
A simple stroke.
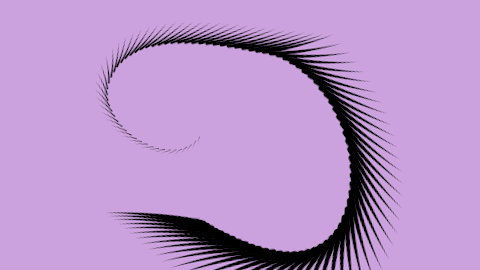
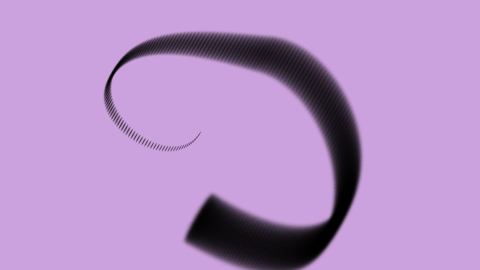
A angled pen. And this is the brush image:
The same but not rotated.
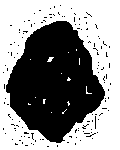
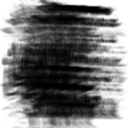
Other brush example. And this is the brush image:
This is the sifz file used to render the examples:
You need to modify the zoom parameter in the Paste canvas layer and the b-amount valuenode to modify the density of the brush to achieve same values than in the examples.
