Guides
Contents
Introduction
Guides are horizontal or vertical lines that you can add to your canvases to help you to position items precisely. They won't appear in your finished animations, but they will be saved with your documents. Each canvas has its own set of guides.
Appearance
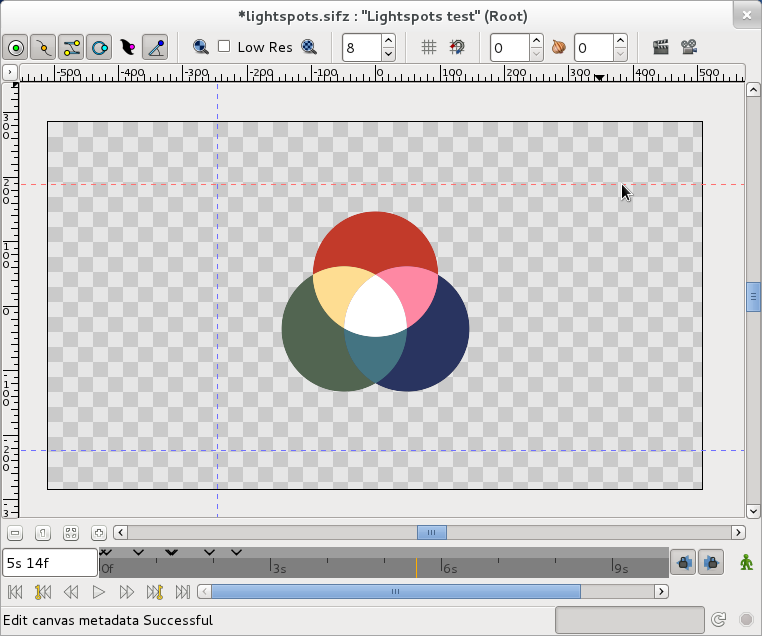
Guides look like this in the canvas window:
As you can see above, they appear as blue dashed lines that extend across your working area to the edges of the canvas window. A guide that is being positioned on the canvas will appear as a red dashed line instead of a blue dashed line.
Adding guides to your canvases
There are two ways to add guides to your canvases. You can drag from the canvas window rulers or you can add guides using the Canvas MetaData Panel.
Dragging from the canvas window rulers
You can add a horizontal guide by moving your mouse over the horizontal ruler at the top of the canvas window, holding down the left mouse button and then dragging your mouse downwards. To show you that you are positioning the guide, it will appear as a red dashed line. When you release the left mouse button the guide will be placed on your canvas and the red dashed line will become blue.
You can add a vertical guide by moving your mouse over the vertical ruler at the left of the canvas window, holding down the left mouse button and then dragging your mouse to the right. To show you that you are positioning the guide, it will appear as a red dashed line. When you release the left mouse button the guide will be placed on your canvas and the red dashed line will become blue.
Using the Canvas MetaData Panel
Advanced users may sometimes want to add guides using the Canvas MetaData Panel. The Canvas MetaData Panel stores its data in Synfig's internal "Synfig units", not in pixels.
To show how this works, we'll open a new file in Synfig Studio and add a vertical guide to the centre of the canvas.
- Select "File → New" or press CtrlN to open a new file.
- Select the Meta Data Panel in the Params, Children, Keyframes, Timetrack, Curves, Canvas MetaData window.
- Select + to Add new metadata entry
- Enter guide_x and click OK or press ↵ Enter
- Double click on the Data column next to the guide_x Key in the Canvas MetaData window
- Type 0 and press ↵ Enter
The guide_x Key in the Canvas MetaData Panel stores all the vertical guides on the current canvas. It stores them as a list floating point numbers separated by spaces.
The guide_y key in the Canvas MetaData Panel stores all the horizontal guides on the current canvas. It stores them as a list of floating point numbers separated by spaces.
Removing guides from your canvases
- Dragging from the rulers
- Using the canvas Meta Data panel
Positioning guides precisely
- Using the info panel
|
Tip The Info panel is not updated when you first add guides to the canvas, but it is updated when you reposition them. We suggest that you place new guides roughly in position first, then reposition them with the help of the Info Panel to get them into exact position.
|
- Using the canvas Meta Data panel
Showing or hiding guides
There are two ways to position your guides precisely. You can use the Info Panel to position your guides, or you can enter a precise position in the Canvas MetaData Panel.
Using the Info Panel
Using the Canvas MetaData Panel
Snapping
- Using info panel
- Using the canvas Meta Data panel
