Gradient Tool
|
Warning! This page contains outdated information. The release of Synfig Studio 0.64.0 introduced new terminology and this translated page needs to be updated according to original English text. You can help updating this page - see instructions here. Thank you! |
The Gradient Tool is used to create smooth transitions between two or more colors in an object.
When you select the Gradient Tool, the Tool Options Panel will show the options for the Gradient Tool.
These allow you to:
- Set a name for the layer you are about to create,
- Choose the type of gradient to create (Linear, Radial, Conical, Spiral) via the dropdown menu.
NOTE: The name of the layer can always be changed later via the Layers Panel or the Params Panel if necessary, but the type of gradient needs to be chosen now.
For help with editing gradient colors see the section on Gestore Gradiente.
There are 4 types of gradients:
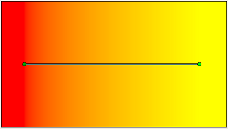
- Linear - This produces a simple transition in a straight line. Set your foreground and background colors. Click where you want the gradient to begin, and drag to where you want the transition to end. The gradient will be created perpendicular to the line you drag out. At any time, you can edit the gradient by moving either endpoint in any direction. You must use the Normal Tool to be able to edit the endpoints.
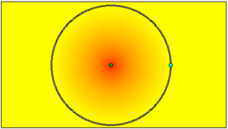
- Radial - This produces circular colors with the transition being at the center of those circles. Click where you want the center of the circles to be, and drag to set the radius of the transition. Use the Normal Tool to edit the position (center endpoint), or the radius (surface endpoint), of the radial gradient.
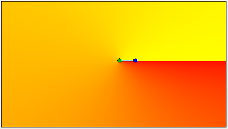
- Conical - This has the appearance of looking down on a tip of a cone. The gradient is along the circular arc of the center and goes in all directions. Click to set the center, and drag to indicate the direction in which the foreground and background colors should go. To edit afterwards, use the Normal Tool. The center endpoint can be adjusted to move the center of the gradient. The other endpoint adjusts the direction of the gradient.
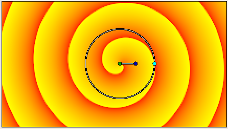
- Spiral - This produces a spiral gradient. Click to set the center of the spiral and drag to set the 'tightness'. To edit afterwards, use the Normal Tool.


