Groups Panel
|
Warning! This page contains outdated information. The release of Synfig Studio 0.64.0 introduced new terminology and this translated page needs to be updated according to original English text. You can help updating this page - see instructions here. Thank you! |
Sa presupunem ca aveti cateva forme pe care doriti sa le modificati in acelasi fel, dar acestea se afla imprastiate in proiect si encapsulate pe straturi diferite. In loc sa extindeti fiecare inline canvas si sa le selectati individual de fiecare data cand doriti sa le editati, puteti folosi Groups. Pentru a adauga unele straturi pentru grupare, selectati-le din caseta Layers Panel, cu click pe butonul din dreapta si alegeti "Add to Group". Va apare o fereastra de dialog in care vi se cere numele grupului. Tastati un nume pentru un grup nou sau numele unui grup existent si dati click pe butonul "OK".
Acul puteti selecta si anima deodata acel grup de pe straturi diferite (de exemplu sale schimbati valorile sau sa le mutati punctele-origine).
Interactiunea curenta cu grupuri sau straturi grupate din caseta Groups poate fi descrisa in termenii urmatori:
- Cu Dublu-click peste o pictograma de Grup se selecteaza toate straturile grupate din caseta straturilor - Layers. Se poate face o selectie multipla a straturilor doar cu un dublu-click. Retineti ca la dublu-click nu se evidentiaza (highlight) straturile grupate din caseta Group.
- Cu Dublu-click peste pictograma unui strat grupat se selecteaza acel strat din caseta Layers si se deselecteaza toate celelalte.
- Cu tasta Ctrl apasata si Dublu-click peste un Grup sau pictograma unui strat grupat se adauga aceasta selectie la obiectele deja selectate din caseta Layers.
- Cu Dublu-click peste un grup sau un nume de strat se permite redenumirea acestora.
- Cu Click pe caseta din stanga pictogramei stratului va dezactiva stratul din caseta Layers.
- Cu Click pe caseta de langa pictograma pentru grup va dezactiva toate straturile din acel grup.
- Un strat dintr-un grup poate fi mutat in orice alt grup (gol sau nu).
- Daca grupul este gol, acesta nu poate fi activat sau salvat.
- Cu un click pe butonul din stanga sau cel din dreapta peste un Grup, putei selecta acel grup. Puteti folosi acest lucru pentru a activa butonul "Remove Group".
- Cu un singur click pe butonul din stanga se selecteaza un strat grupat. Puteti selecta mai multe straturi daca tineti apasata tasta Ctrl sau ⇧ Shift, dar efectul pe comenzile urmatoare va afecta doar ..... layer that you right-click on.
Single right click over a grouped layer pops up the context menu with the same elements as you have for each layer in the Layers Panel:
- "Select All Children": This menu entry appears only if the grouped layer is a paste canvas. The behavior is the same as in the Layers Panel - all layers inside of the Paste Canvas layer are selected.
- "Add Layers to Group": Displays a dialog to enter a Group name and moves the select layer to the new group. Only works for the layer below the cursor when multiple selection is done.
- "Remove Layers from a Group": Removes the selected layer from the group. Only one layer at a time can be removed. Even if multiple layers are selected only the layer below the cursor when right clicking is removed.
- "Duplicate layer": Works the same as duplicate layer from the Layers Panel and also add the duplicated layer to the current Group. It works partially because you cannot duplicate multiple layers as in the Layers Panel. It only acts over the layer you did the right click. The selection is ignored.
- "Encapsulate": It works the same as the Encapsulate Layers from the Layers Panel but only affects to the layer where the right click is done.
- "Remove Layer": It works the same as the Remove Layers from the Layers Panel but only affects to the layer where the right click is done.
- "Set Layer Description": Displays a dialog for renaming the layer.
- "Raise Layer / Lower Layer": Does the same than in the Layers Panel. It doesn't modify the position in the grouped layer in the Group but the position in the Layers Panel hierarchy is modified as expected.
Notice, that a layer can only belong to one Group at a time. Adding a layer to a Group when it's already in previous group will remove it from the previous group.
Groups can be nested. You can make nested groups one of the following ways:
- by adding a layer to a group with a name containing dot as separator: "parent.child"
- by dragging a group inside other group
The contents of the nested groups is selected when you double-click the parent group icon. Depending on what group level you click you can select more or less layers.
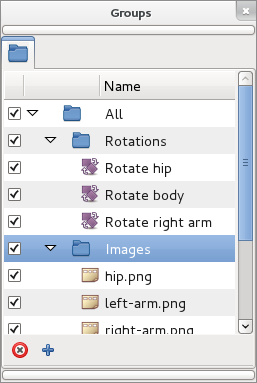
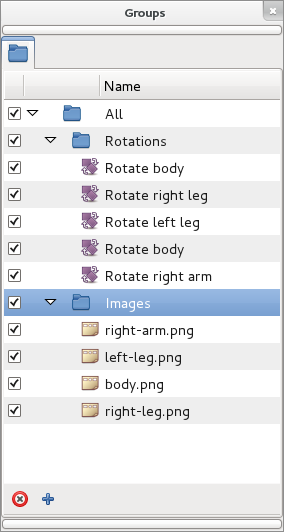
For example making a double click on the 'All' Group will select Rotations and Images grouped layers in once double click.
Regarding to the buttons:
- "Add New Group" button adds empty deactivated group.
- "Remove Group" button removes selected group. If the group contains other groups they are not recursively deleted, only the first child level of layers.
Also Groups scope is the current edited Canvas. That means that only the grouped layers that belong to the current Canvas being edited are show in the Group dialog. It also means that Groups are File/Canvas dependent. It means that a layer can only belong to a group defined in its exported canvas scope. For example, if there are two canvases where B is the root one and A is a pasted one inside B, then a layer that belongs to exported canvas A can belong only to Groups defined at canvas A scope. Although you can select the layer from the outer root canvas (B) you cannot group it into any group defined at B scope. You can also have groups with the same name in different file/canvas scope. If a layer is dragged out from a pasted canvas and it belongs to a group, the group name is dragged out also.
See the talk area for more info.
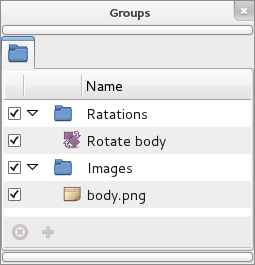
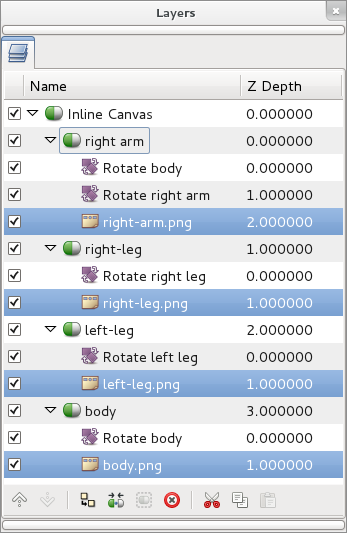
Here are shown some examples of what can be done using groups for a complex file:
| Samples | Groups | Effects after double click on the highlighted Group |
| Sample1 | ||
| Sample2 |


