Animation Basics
| Language: |
English • Deutsch • español • suomi • français • italiano • Nederlands • português • română • русский • 中文(中国大陆) |
Contents
Introduction
Creating an animation in Synfig Studio is really easy. It basically means to change a drawing — you just need to create the first stage and last stage of a change, and Synfig takes care of the steps in between.
Let's look at a simple example. Consider a moving light like the one at the front of the Knight Rider car. Drop the realism, you get a circle moving from left to right and back. In other words, you need to create three 'steps' or 'stages':
- The circle is on the left.
- The circle is on the right.
- The circle is back on the left.
Setting up the workspace
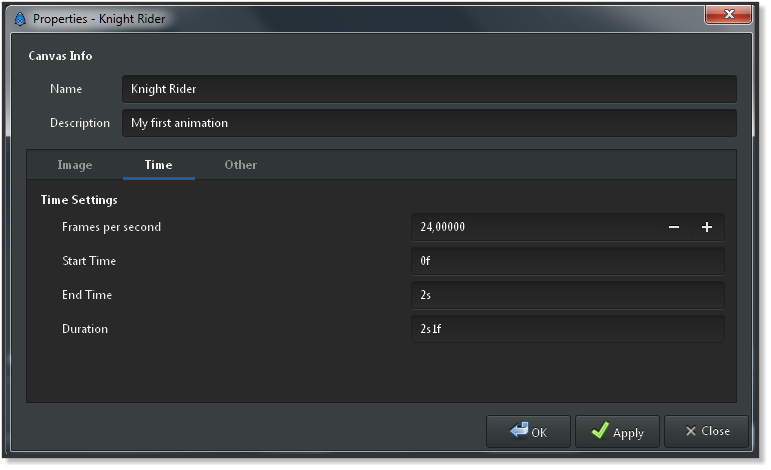
Let's do it. Start Synfig Studio. A new file is created at the start automatically . Click the caret menu (between the horizontal and vertical rules, in the top left hand corner of the canvas), then select "Edit → Properties". The Canvas Properties Dialog will appear.
Give a name and description for your canvas, then click "Apply" (don't click "OK" yet — we're not quite done with the Properties dialog). Go to the "Time" tab and make sure to edit "End Time". Change "5s" to "2s" — that will make our animation 2 seconds long.
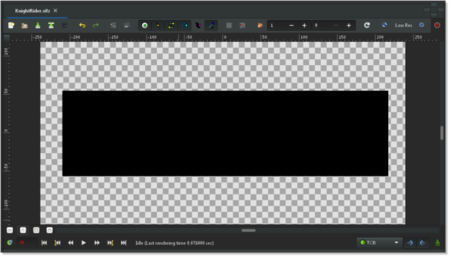
Now click "OK", select the Rectangle Tool and create a simple black rectangle that will serve as our background. It's not necessary to make it cover the whole canvas.
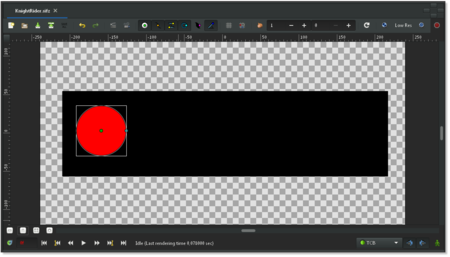
Now we need a circle. Change the fill color to red, select the Circle Tool and create a circle. It doesn't matter if it's not perfect: You can edit it. Select the Transform Tool and click the circle. It will go into an editing mode which is easy to detect by the small green dot in the middle and the white rectangle around it. You can move the circle by grabbing it on its green dot (the Origin) in the middle.
These are the first steps to draw an object and to move it, but not an animation yet, you may say. Indeed. Let's have a look how this works.
Adding movement
In the beginning, you entered a value of 2 seconds in the Properties dialog. Because the length of your animation is non-zero, your canvas window (the one where you draw) has a grey time slider at the bottom, the Timebar. You can click on it, and a small orange indicator will appear indicating your position in time. Try clicking in several places on the time slider and notice that the entry field on the left of the time slider is changing its values to something like "12f", "1s 15f", etc. You can set your position on the time slider by changing values in that field. For example, if you enter "1s" and press ↵ Enter, the orange indicator will move in the middle of the time slider, and entering "2s" will move it to the end of the time slider.
|
Note At 2s the orange indicator won't be visible. That's because "2s" is at the far right boundary of the time slider, putting the indicator out of view.
|
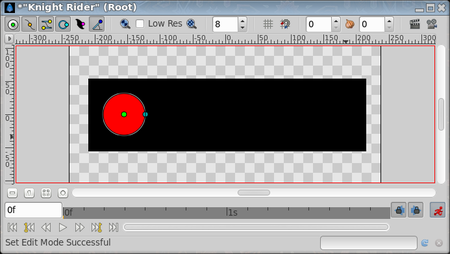
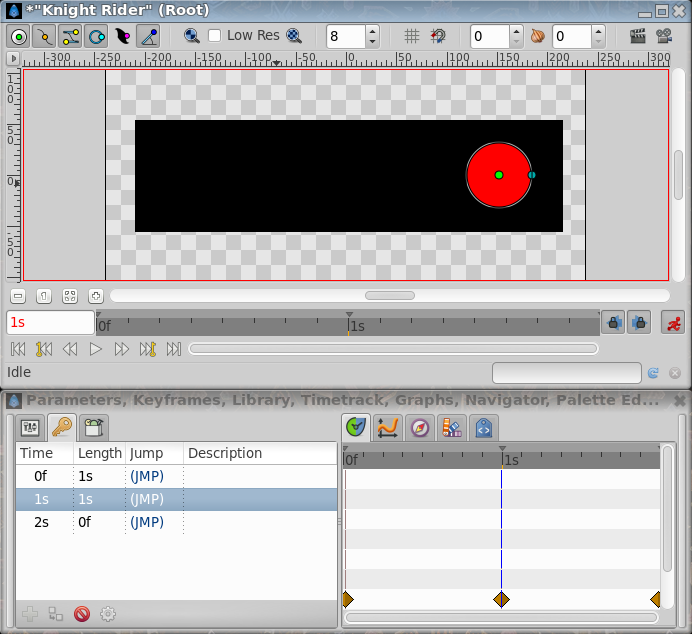
You may notice that nothing changes on the canvas at this point. Return to "0s" and switch to Animate Editing Mode by clicking the green man button to the right of the gray time slider. The canvas will display a red outline; it reminds you that changes to your objects now affect your animation at the time shown in the time slider.
In animate editing mode, every change to your objects creates a waypoint that associates the changes with the current time. As you will see, Synfig can create smooth intermediate changes between waypoints, and you can even choose the way in which the intermediate changes take place. You will probably find it helpful to associate some or all of your waypoints with keyframes.
Previously, three "steps" or "stages" were mentioned. These are represented by keyframes. (Just in case you're familiar with video encoding: No, it's not the same!) A keyframe is an image in time where something important happens with your objects.
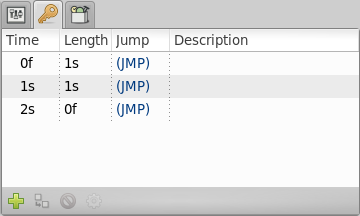
Go to the Keyframes Panel — click on the little tab with the small key icon in the bottom window — to edit keyframes. Now press the small button with the "plus" sign and you should get a new entry in the list displaying "0f, 0f, (JMP)".
Now, go to the "1s" mark in the time slider. The small orange indicator should move there. Then add another keyframe by clicking the small plus sign. Repeat the process with the time slider indicator set to "2s" (it's at the end of your animation). You should now have three keyframes in the list.
The s's and f's: Understanding the Timeline
By now, you may have figured out what those mysterious "1s 10f"-type marks represent. They indicate a specific point on the timeline, expressing a location in terms of seconds (s) and frames (f).
By default each second is divided into 24 frames, much like a meter on a measuring tape is divided into 100 centimeters. The frame markings begin at zero (0) and go up to 24, whereupon a new second is entered and the framecount returns to zero.
For example, when five whole seconds and three frames have passed, using this timeline notation would be "5s 3f".
The Keyframes Panel
The Keyframes Panel is rather easy to understand. It displays "Time" which is basically the start time, "Length" which is self-explanatory, "Jump" which we'll cover next, and "Description" which is, again, self-explanatory.
Now, you might be wondering about the entries called "(JMP)". In fact, these are links just like web links: click them, and the indicator in your time slider will jump to the correct time.
You can use this to edit your image for a given moment in time. For instance, you can now jump to the first second, and move the red circle to the right. There! You made your first movement, your first animation with Synfig!
Wondering where the animation is? Just click to an arbitrary position on the time slider: You will note that the red circle is in a new position, one that you didn't specify! So what happened? Synfig figured out what you would like to do, namely move the circle, and drew all the images between these states. Each image will later make a frame in your animation and the circle will appear to be moving.
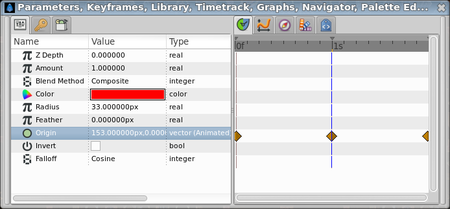
Note that you don't need to go to the last keyframe at "2s" and move your circle back to the left. Keyframes make Synfig remember the image states at particular times. That's why when we modified the circle's position at "1s", it stayed on the left at "2s" (as well as at "0s"). If you switch back to the Parameters Panel, and look at the Time Track Panel you will see that three orange diamonds (or green dots in previous versions of synfig) appeared on the right of the "Origin" parameter. Those are called Waypoints, and they represent times at which object's parameters, like location or color, are instructed to take on specified new values.
Rendering your animation
Before you can see your animation, you need to render your work. There are two ways to do so: using the Synfig Studio (what you have been using so far) or the command-line program called "synfig".
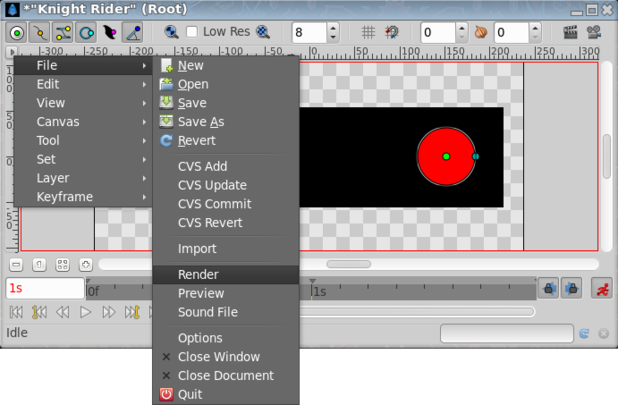
Let's try the first way. Leave the animate editing mode by clicking on the red dot in the timeline editing widget, and save your file; for instance under the name "BasicKnightRider.sifz". Then go to menu in the Canvas Window ("caret" button in the upper left corner) and select "File → Render". Change the filename to "BasicKnightRider.gif" in the same location where you saved "BasicKnightRider.sifz" and choose "gif" target format instead of "Auto", then click Render. Depending on your processor speed it should take a few moments, but finally the image window status bar (located on the bottom of the window) should say "File rendered successfully".
|
Note The "magick++" target (if it is available) produces much better gif files than the "gif" target because it can optimize the palette for the image.
|
Open BasicKnightRider.gif in Firefox or another application that is able to show animated gif's. However, Firefox will replay the GIF all the time which makes your short animation a rather long one. If you're now seeing a red circle moving from the left to the right and back, congratulations! You just made your first animation!
|
Note You can also preview your animation. Press the "caret" menu button in the upper left corner of the Canvas Window and choose "File → Preview".
|
If you would rather use the command line instead of the menu to render your animation, then open a terminal (on Windows, go to "Start → Run", type "cmd" and press ↵ Enter), change to the directory you saved the file in, and type something like this:
synfig -t gif BasicKnightRider.sifz
A few messages appear that don't matter right now. Depending on your processor speed it should take a few moments, but finally a line like this will appear:
BasicKnightRider.sifz ==> BasicKnightRider.gif: DONE
Then you are done and can view your animated gif using Firefox or another program as mentioned above.
Conclusion
Of course, the position of an object is not the only thing you can change with Synfig Studio. Other possibilities include its size, its outline, its color, etc. Synfig comes with several example files that should let you dig deeper into the possibilities.
Now, let's continue with the next manual chapter: Adding Layers
You can download the project used : File:BasicKnightRider.sifz
