Basi per l'Animazione
| Language: |
English |
|
Warning! This page contains outdated information. The release of Synfig Studio 0.64.0 introduced new terminology and this translated page needs to be updated according to original English text. You can help updating this page - see instructions here. Thank you! |
Contents
Introduzione
Creare un'animazione in Synfig Studio è molto facile. Significa fondamentalmente modificare un disegno — è sufficiente creare la prima fase e ultima fase di una variazione, e Synfig si occuperà dei passi intermedi.
Diamo un'occhiata ad un semplice esempio. Consideriamo una luce in movimento come quella della barra anteriore di Supercar. Realismo a parte, realizziamo un cerchio con movimento da sinistra a destra e ritorno. In altre parole, dobbiamo eseguire tre 'passi' o 'fasi':
- Il cerchio è a sinistra.
- Il cerchio è a destra.
- Il cerchio è ritornato a sinistra.
Impostazione dell'area di lavoro
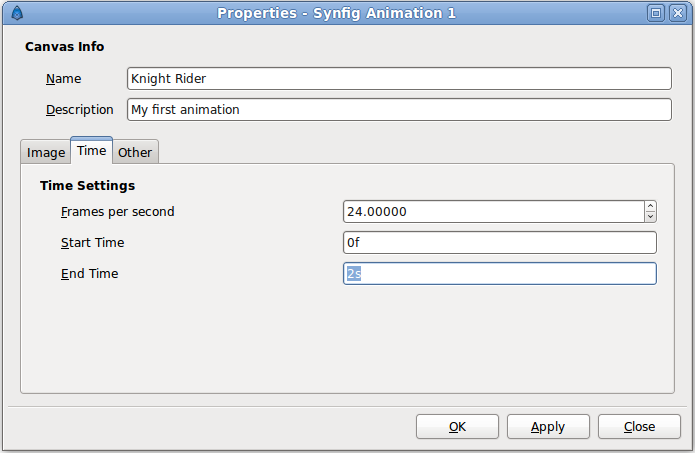
Partiamo. Avvia Synfig Studio. Un nuovo file verrà automaticamente generato. Clicca il menù 'simbolo' [►] (tra i righelli orizzontale e verticale, nell'angolo in alto a sinistra della tela), poi seleziona "Edita → Proprietà". Apparirà un dialogo per le proprietà della tela.
Definisci un nome e una descrizione per la tela, poi clicca "Applica" (non premere ancora "OK" — non abbiamo ancora terminato con il dialogo Proprietà). Vai sull'etichetta "Tempo" e ricordati di editare "Tempo Finale". Cambia "5s" in "2s" — così la tua animazione durerà 2 secondi.
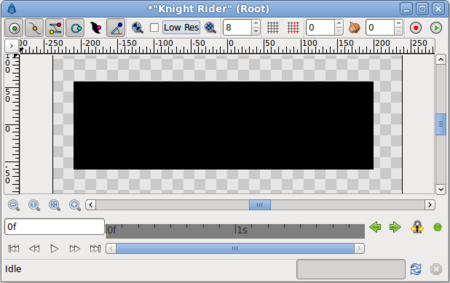
Ora disegna un semplice rettangolo nero che ci servirà come sfondo. Non è necessario ricopra l'intera tela. Deseleziona anche la casella "Bassa Risoluzione" in cima alla finestra della tela per disabilitare la modalità a bassa risoluzione - che renderà l'immagine più nitida. Solitamente, con questa opzione abilitata aumenta la velocità di visualizzazione, ma non è quello di cui abbiamo bisogno adesso.
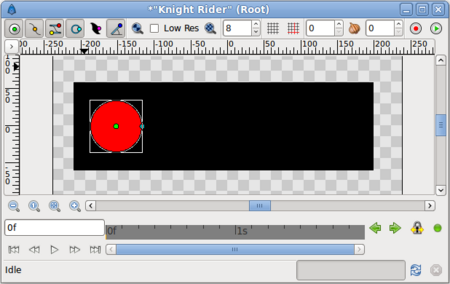
Ora ci serve un cerchio. Varia il colore di riempimento a rosso, e disegna un cerchio. Non importa se non è perfetto: Lo puoi modificare. Attiva lo Strumento Trasforma, e seleziona il cerchio. Si presenterà in modalità di editazine facilmente riconoscibile dal punto verde nel mezzo ed il rettangolo bianco attorno. Puoi spostare il cerchio rosso trascinandolo dal punto verde nel mezzo.
Questi sono i primi passi per disegnare un oggetto e spostarlo, ma non è ancora un'animazione, dirai. Infatti. Vediamo come si fa.
Rendiamo il movimento
In the beginning, you entered a value of 2 seconds in the Properties dialog. Because the length of your animation is non-zero, your canvas window (the one where you draw) got a grey time slider at the bottom. You can click on it, and a small orange indicator will appear indicating your position in time. Try clicking in several places on the time slider and notice that the entry field on the left of time slider changing its values to something like "12f", "1s 15f", etc. You can set your position on the timeslider by changing values in that field. For example, if you enter "1s" and press ↵ Enter, the orange indicator will move in the middle of time slider, and entering "2s" will move it to the end of time slider.
|
Note In the last case orange indicator will become invisible, because "2s" is right at the boundary of time slider, just believe us — it's there.
|
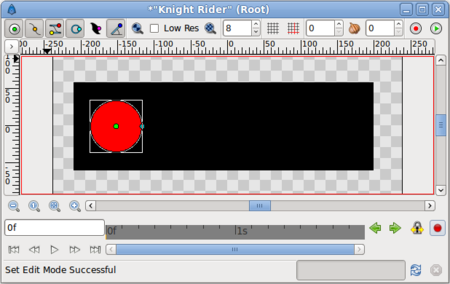
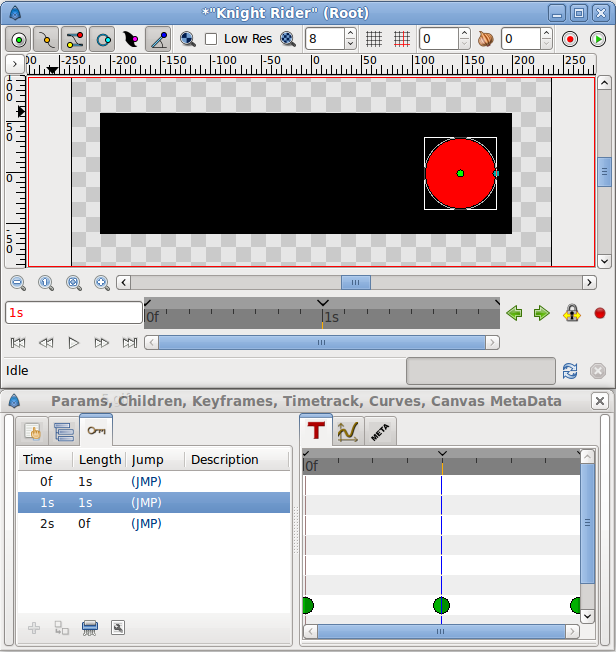
But when you changing your position on the time slider nothing changes on the canvas yet. First, you need to switch to "Animate Editing Mode" by clicking the green dot just to the right of the gray time slider. Note that your canvas gets a red outline; it reminds you that changes to your objects now affect your animation.
Previously, three "steps" or "stages" were mentioned. These are represented by so-called "keyframes". (Just in case you're familiar with video encoding: No, that's not the same!) A keyframe is an image in time where something important happens with your objects.
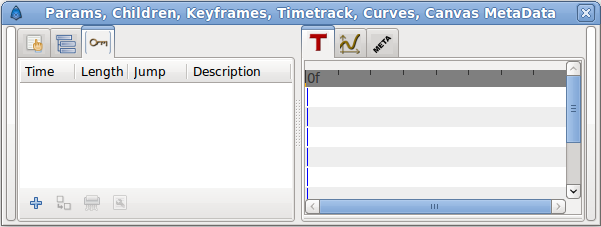
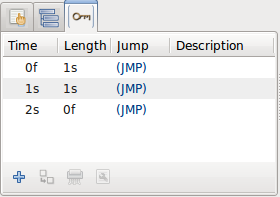
Go to Keyframes panel — just click on the little tab one with the small key icon in the bottom window — to be able to edit keyframes. Now press the small button with "plus" sign and you should get a new entry in the list displaying "0f, 0f, (JMP)".
Now, go to the "1s" mark in the timeslider. The small orange indicator should move there. Then add another keyframe by clicking the small plus sign. Repeat the process with the time slider indicator set to "2s" (it's at the end of your animation). You should have three keyframes in the list, now.
The s's and f's: Understanding the Timeline
By now, you may have figured out what those mysterious "1s 10f"-type marks represent. They indicate a specific point on the timeline, expressing a location in terms of seconds (s) and frames (f).
By default each second is divided into 24 frames, much like a meter on a measuring tape is divided into 100 centimeters. The frame markings begin at zero (0) and go up to 24, whereupon a new second is entered and the framecount returns to zero.
For example, when five whole seconds and three frames have passed, using this timeline notation would be "5s 3f".
The Keyframe List
The keyframe list is rather easy to understand. It displays "Time" which is basically the start time, "Length" which is self-explanatory, "Jump" which we'll cover next, and "Description" which is, again, self-explanatory.
Now, you might be wondering about the entries called "(JMP)". In fact, these are links just like web links: click them, and the indicator in your timeslider will jump to the correct time.
You can use this to edit your image for a given moment in time. For instance, you can now jump to the first second, and move the red circle to the right. There! You made your first movement, your first animation with Synfig!
Wondering where the animation is? Just click to an arbitrary position on the timeslider: You will note that the red circle is in a new position, one that you didn't specify! So what happened? Synfig figured out what you would like to do, namely move the circle, and drew all the images between these states. Each image will later make a frame in your animation and the circle will appear to be moving.
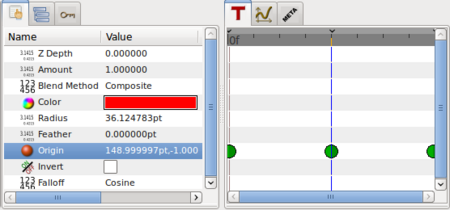
Notice, that you don't need to go to the last keyframe at "2s" and move your circle back to the left. Keyframes make Synfig remember image state at particular time. That's why when we modified circle position at "1s", it stays on the left at "2s" (as well as at "0s"). If you switch back to Params Panel, and look at the Timetrack Panel you'll notice a three green dots appeared on the right of "Origin" parameter. Those are called Waypoints and they used to indicate changes of parameter over time.
Rendering your animation
Before you can see your animation, you need to render your work. There are two ways to do so: using the Synfig Studio (what you have been using so far) or the command-line program called "synfig".
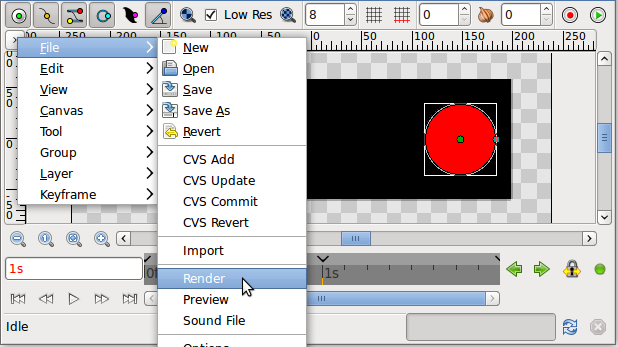
Let's try the first way. Leave the animate editing mode by clicking on the red dot in the timeline editing widget, and save your file; for instance under the name "BasicKnightRider.sifz". Then go to menu in the Canvas Window ("caret" button in the upper left corner) and select "File → Render". Change the filename to "BasicKnightRider.gif" in the same location where you saved "BasicKnightRider.sifz" and choose "gif" target format instead of "Auto", then click Render. Depending on your processor speed it should take a few moments, but finally the image window status bar should say "File rendered successfully".
|
Note The "magick++" target (if it is available) produces much better gif files than the "gif" target because it can optimise the palette for the image.
|
Open BasicKnightRider.gif in Firefox or another application that is able to show animated gif's. However, Firefox will replay the GIF all the time which makes your short animation a rather long one. If you're now seeing a red circle moving from the left to the right and back, congratulations! You just made your first animation!
|
Note You can also preview your animation. Press the "caret" menu button in the upper left corner of the Canvas Window and choose "File → Preview".
|
If you would rather use the command line instead of the menu to render your animation, then open a terminal (on Windows, go to "Start → Run", type "cmd" and press ↵ Enter), change to the directory you saved the file, and type something like this:
synfig -t gif BasicKnightRider.sif
A few messages appear that don't matter right now. Depending on your processor speed it should take a few moments, but finally a line like this will appear:
BasicKnightRider.sif ==> BasicKnightRider.gif: DONE
Then you are done and can view your animated gif using Firefox or another program as mentioned above.
Conclusion
Of course, the position of an object is not the only thing you can change with Synfig Studio. Other possibilities incude its size, its outline, its color, etc. Synfig comes with several example files that should let you dig deeper into the possibilities.
| Language: |
English |
