Créer des formes
Cette page a besoin d'être traduite, soyez patient et/ou participez!
Contents
Introduction
Les primitives de base telles les cercles ou les rectangles sont toutes merveilleuses, mais plutôt rigides géométriquement parlant. Pourquoi ne créerions-nous pas des formes plus élaborées ? Pour le faire nous utiliserons l'outil BLine.
L'outil BLine
Dans Synfig l'élément de description des formes est appelé BLine. C'est grossièrement analogue à ce que d'autres programmes intitulent "chemin" sauf qu'il s'agisse exclusivement de Spline hermites.
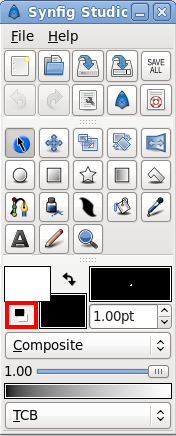
Avant de commencer avec le tutoriel de BLine ajoutons quelques élements complémentaires sur la façon de fonctionner de Synfig. Quand vous cliquerez sur l'outil Bline (en BLine Tool/fr), vous vous apercevrez que les sommets de l'objet en cours de sélection (si il en existe un) vont disparaître, mais que le calque correspondant restera sélectionné dans le Panneau des Calques (en Panneau Calques). C'est normal. Quoique vous fabriquiez avec l'outil BLine sera inséré au-dessus du calque en cours de sélection. Gardez en mémoire que si vous voulez insérer une forme quelque part, vous devrez sélectionner exactement où vous voulez l'insérer avant d'activer l'outils BLine — changer de sélection après-coup vous renverra automatiquement dans l'outil de transformations (en Outil de transformation).Maintenant allez-y ! Cliquez sur le bouton "Réinitialiser les couleurs" dans l'angle inférieur gauche du widget de couleurs FG/BG (Premier plan/arrière plan) de la (en) boite à outils. Celà rétablira les couleurs par défaut noir et blanc. Paramétrez également (en) épaisseur par défaut des lignes vers quelque chose de bien assez fin — 10pt devrait faire l'affaire.
Lorsque vous activerez l'outil BLine, vous irez vérifier le (en) panneau d'options des outils. Assurez-vous que seules les options "Créer une région (BLine)", "Créer un contour (BLine)" et "Lier les origines" soient cochées.
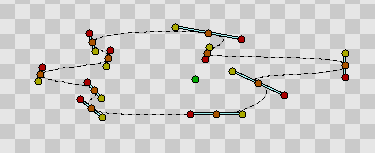
Si vous cliquez avec votre souris sur le calque vous positionnerez des vertexs (ou noeuds, ou sommets). Pendant que vous placez un vertex (sans relâcher) vous pouvez déplacer ses tangentes en déplaçant la souris. Répétez cela plusieurs fois et vous construisez un Vertices : une liste de points BLine.
Il faut garder cependant à l'esprit que si durant cette construction vous n'aimez pas l'endroit ou vous avez positionné un vertex il n'y a rien qui vous permet de le déplacer. Si vous voulez supprimer un vertex, cliquez droit (sans relâcher) sur le vertex et sélectionnez "Supprimer le Vertex". Vous voulez séparer les tangentes ? Cliquez droit (sans relâcher) sur le vertex et sélectionnez "Séparer les tangentes". Vous voulez fermer la BLine ? Cliquez droit (sans relâcher) sur le vertex et sélectionnez "Fermer la BLine".
Lorsque vous avez terminer de placer les vertexs, nous devons sortir du mode de construction pour créer le calque(s) BLine; Il y a deux manières de procéder:
- Changer d'outil.
- Cliquez le bouton "Créé une BLine et/ou une Région" dans le bas du panneau d'options des outils (c'est l'icone qui ressemble à un trois engrenages)
Pour le moment, continuons, changez d'outil pour en l'Outil de transformation, nous en avons finit avec l'outil BLine.
Editer les BLines
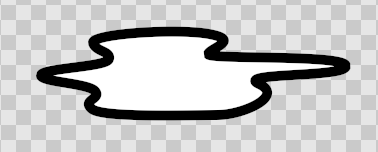
Ok, nous avons une mignonne et plutôt pale région avec un épais contour noir. Puisque nous avons coché "Créer une région (BLine)" et "Créer un contour (BLine)" dans les étapes précédentes, vous devriez remarquer qu'il y a deux calques créé — le (en) Contour ainsi que (en) Région dans le panneau Calque. Bien que dans les faits vous avez deux calques différent, les paramètres de leurs vertexs ont été (en) liés — vous pouvez donc sélectionner indifféremment l'un ou l'autre calque et déplacer ses ducks, l'autre devrait aussi se déplacer.
Si vous voulez manipuler le vertices après que vous ayez créé les calques, c'est très simple. Cliquez simplement sur un calques et déplacer le vertex ou ses tangentes. Si vous voulez supprimer un vertex, cliquez droit dessus et sélectionner "Supprimer l'élément (Intelligent)".
|
Note L'unique et majeure différence entre ce mode d'édition normal et le mode de construction, c'est comment vous pouvez séparer les tangentes — dans le mode de construction vous cliquez droit directement sur la tangente. Dans le mode normal d'édition des poignées (ducks), vous pouvez cliquez droit sur le vertex auquel les tangentes sont attachés. Cela peut être considéré comme un dysfonctionnement d'usage et seras résolu un jour.
|
Cela peut sembler être une pagaille de calques. Et oui, si vous n'utilisez pas le logiciel correctement, c'est exactement ce que vous obtiendrez. Mais il y a une manière plus sensé de procéder. Comme il est indiqué dans le tutoriel précédent, vous pouvez (en) encapusler les calques de manière hiérarchique.
Une chose rapide à mentionner avant d'en finir. Vous pouvez changer la largeur du contour de chaque vertex. Vous faites cela en sélectionnant le calque contour (NOTE: vous devez sélectionner le calque Contour, le calque Région ne possède pas d'informations de largeur) et ajuster avec les poignées de largeur. Par défaut celles ci sont masquées. Pour les faire apparaitre, pressez Alt5 ou cliquez sur le bouton "Basculer les poignées" dans la partie supérieur de la fenêtre canevas (le cinquième bouton en partant de la gauche). Répétez pour les cacher. Vous pouvez également voir d'autres choses à masquer via le Menu chevron du Caneva: "Affichage → Afficher/Masquer les poignées".
Using tablet to draw shapes
If you have a graphic tablet you can use Draw Tool to create BLines.
Synfig Studio supports pressure sensitivity, but you need to configure it first. Go to "File → Input Devices..." from toolbox menu. In the Input dialog find your tablet's stylus device and set its mode to "Screen". Click "Save" and then "Close".
Now grab your stylus, create a new file and click on the Draw Tool button in the toolbox. Set the default line width value to be big enough — say, 15pt — otherwise you will not notice any pressure sensitivity effect. Choose brown as the default fill color.
|
Note Steps above should be done with the stylus of your tablet, not the mouse. Synfig Studio remembers settings for each input device independently. That's why if you set those options with your mouse device they will not have any effect when you switch to stylus.
|
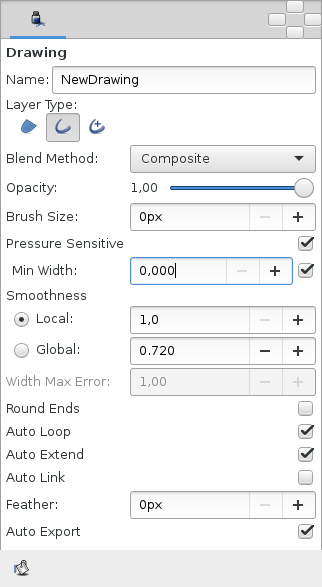
In the Tool Options Panel, make sure that you have the same options as shown on the screenshot below.
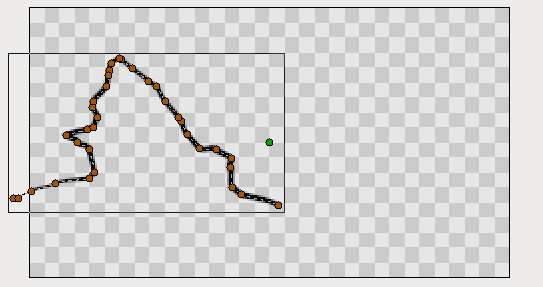
Now let's draw some thing like a curvy mountain background. Start drawing a line from the left border to the middle of the canvas. Try to vary your stylus pressure while you are drawing. Stop near the center of the canvas. This is your first line. Notice the new outline layer created in the Layers Panel.
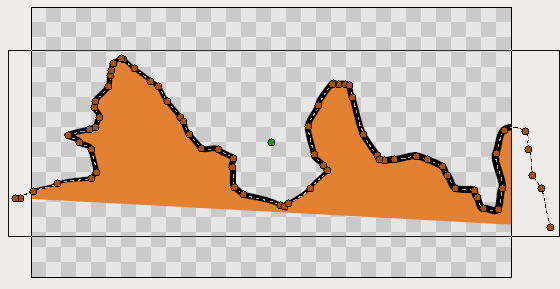
Point your stylus at the last duck of your new BLine and continue drawing to the right border of the canvas. When you finish, look at the Layers Panel again. There's still only one outline layer. Synfig Studio is smart enough to figure out that you don't need a new outline layer and properly extends the last one. You can extend the BLine from both ends, but if you start drawing from any other place of the canvas a new outline layer will be created. Though your first line will remain selected and nothing stops you from extending it later.
Back to our artwork. In the Tool Panel hit the button with the bucket icon to fill the outline we just created. A region layer will appear at the top of the layer we are working with. Select the outline layer and press the "Raise Layer" button in the layers panel to put the outline layer on top of the region.
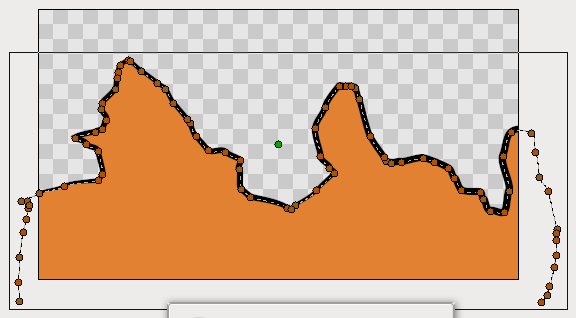
Extend a line from both sides down to the corners of the canvas to make the fill appear at the bottom. Great.
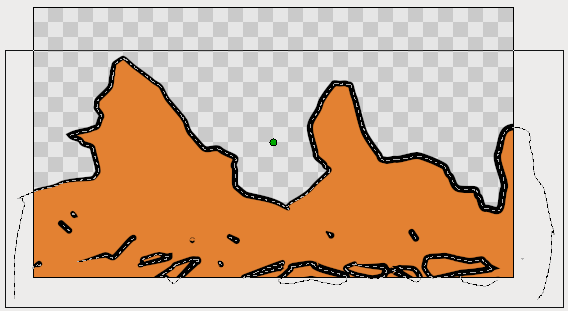
Go ahead and add a few more lines on top of the filled area to give it a mountain-like look. If brown ducks are in your way, you can hide them by clicking the "Toggle vertex ducks" button at the top of the canvas window (the second one from the left).
|
Warning! Don't use Alt2 shortcut to turn off visibility of vertex ducks while you using Draw Tool. There's a bug that will cause Synfig Studio to hang.
|
This bug is fixed in the upcoming release (0.63.00).
Draw tool is great for drawing complex shapes, but you end up with a bunch of ducks, which are hard to manipulate with the Transform Tool in the way we described above. There are two solutions here.
First, you can increase the "Smooth" value in the Tool Options Dialog while using Draw Tool. That will reduce the count of vertices produced at drawing time, but will make your shape less detailed.
Second, you can use Smooth Move Tool to deform an existing shape. Go for it and click the Smooth Move Tool button in the toolbox. The trick about this tool is that it affects selected ducks only. Press and hold your left mouse button in an empty place of the canvas. Drag to create a selection box. Release the mouse button when you are done. Or just hit CtrlA to select all ducks. Now you can deform the selected segments of BLines. You can change the size of the influence area by tweaking "Radius" in the Tool Options Panel.
What about outline width? There is a Width Tool for that purpose. It is designed for increasing or decreasing the width of a line much like you would with a pencil on paper. Click the Width Tool button in the toolbox, move your stylus over the line you want to change, press and move the cursor back and forth along the line, like you are scratching something. The width of the outline will be increased at the places where you moved the cursor. If you want to decrease the width, just hold "Ctrl" while scratching. Easy!
If you don't want Width Ducks to be displayed, during usage of the Width Tool, just turn them off by pressing the "Toggle width ducks" button at the top of the canvas window.
|
Warning! Don't use Alt5 shortcut to turn off visibility of width ducks while you using Width Tool. There's a bug that will cause Synfig Studio to hang.
|
This bug is fixed in the upcoming release (0.63.00).
Other ways to create BLines
Is that all? Not yet. You can use Circle, Rectangle, Star and Polygon tools to create BLines too. Just check the "Create Outline BLine" and "Create Region BLine" options in the Tool Options Panel when using those tools.
Creating geometric primitive as BLine gives you a better control over it's shape and look. For example, if you want a deformed star, then you can use the Star Tool to create it as outline and region BLines and then use the Transform Tool to deform it.
Now you are ready for the last tutorial in this section. Hang on!

