Keyframe/ro
|
Warning! This page contains outdated information. The release of Synfig Studio 0.64.0 introduced new terminology and this translated page needs to be updated according to original English text. You can help updating this page - see instructions here. Thank you! |
Contents
Ce este un cadru-cheie (keyframe)?
Un cadru-cheie este de fapt un "marcaj" de pe linia timpului. Acest marcaj permite utilizatorului sa indice aplicatiei Synfig starea animatiei in acel punct (cadru). Altfel zis, cadrul-cheie este ca o eticheta care ii indica aplicatiei Synfig ca acest cadru trebuie luat in calcul la crearea punctelor-cale (waypoints). La fel, indica faptul ca acel cadru marcat este un cadru special in care este stocata informatia pentru fiecare parametru al fiecarui strat pentru a fi refolosita ulterior.
Fiecare cadru-cheie este asociat cu un cadru particular; un cadru poate avea doar un cadru-cheie.
Cum arata un cadru-cheie?
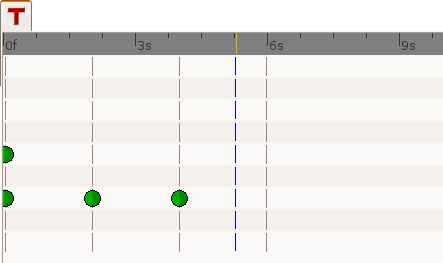
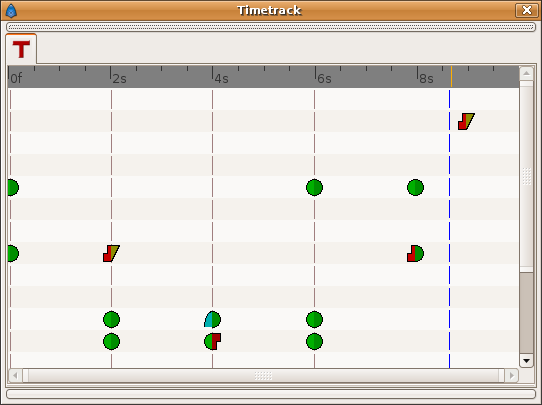
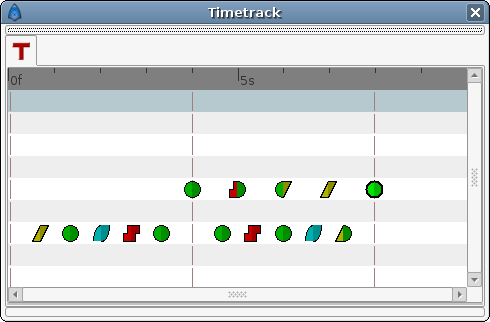
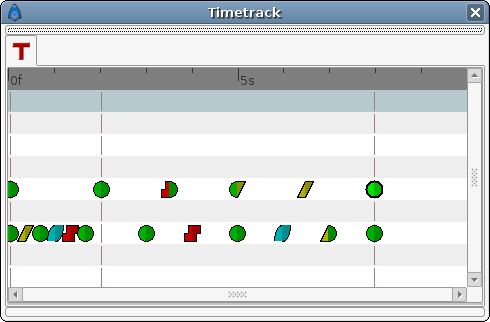
Un cadru-cheie este afisat ca o linie intrerupta verticala de culoare maro, care se afla in caseta Timetrack Panel, asezata in cadrul corespunzator. Puteti sa o deosebiti de cursorul timpului dupa culoare (cursorul timpului este de culoare albastra).
Punctele verzi din imagine sunt "puncte-cale" - waypoints.
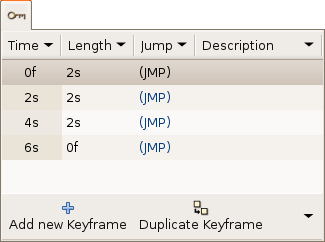
Cadrele-cheie apar si ca valori intr-o lista din caseta Keyframes Panel (fereastra de dialog pentru cadre-cheie).
Cadre-cheie si puncte-cale (waypoints)
Un cadru-cheie nu implica neaparat un punct-cale, iar un punct-cale nu implica neaparat o cheie-cadru.
Un cadru-cheie poate exista fara niciun punct-cale si pastreaza informatia despre valorile parametrilor din acel cadru. Daca acolo exista si un punct-cale, atunci este pastrata si informatia despre punctul-cale (waypoint) (doar parametrul valoare). Daca nu exista niciun punct-cale in cadru-cheie, atunci valoarea "pastrata" este rezultatul punctelor-cale din apropiere, valorile parametrilor acestora si valorile de interpolare pe care le au punctele-cale. Acest lucru inseamna ca un cadru-cheie retine valorile parametrilor la acel cadru, dar nu le stocheaza static in acel cadru. Pentru a mentine o valoare statica a parametrului intr-un anumit cadru, trebuie sa folositi un punct-cale.
Crearea unui punct-cale poate duce la crearea a noi puncte-cale in cadrul-cheie invecinate, care depind de valoarea curenta a starii Editing Lock Keyframes. Deci, crearea unui punct-cale (prin modificarea unui parametru sau prin copierea sau mutarea unui punct-cale sau prin duplicarea unui cadru-cheie) poate conduce la crearea unui punct-cale in cadrele-cheie care sunt imediat inaintea si dupa cadrul in care a fost introdus punctul-cale. Punctele-cale create in cadrele-cheie invecinate sunt create in functie de valoarea de interpolare implicita din fereastra cu instrumente.
Vedeti si exemplele pentru a intelege cum functioneaza.
Adaugarea, duplicarea si stergerea cadrelor-cheie
Adaugarea unui cadru-cheie
Asezati cursorul pentru timp la un cadru diferit de cadrul-cheie curent. Apoi apasati butonul Add new Keyframe. Daca asezati cursorul pentru timp intr-un cadru unde deja exista un cadru-cheie, atunci butonul Add Keyframe este inactiv. Dupa ce apasati pe buton, va fi adaugata o noua valoare in lista cu cadre-cheie si o linie intrerupta corespunzatoare in linia pentru timp. Nu este creat niciun punct-cale.
Duplicarea unui cadru-cheie
Selectati o cheie-cadru din lista casetei Keyframes Panel si asezati cursorul pe un cadru in care nu exista chei-cadru. Apoi apasati butonul Duplicate Keyframe. Veti obtine doua efecte separate:
- Daca exista un punct-cale in cadrul-cheie original, atunci punctul-cale va fi duplicat. Duplicatul include valoarea parametrului si tipurile de interpolare.
- Daca nu exista punct-cale in cadrul-cheie original pentru niciun parametru particular, atunci pot avea loc doua lucruri:
- Daca nu exista punct-cale pentru acel parametru in NICIUN cadru din linia pentru timp: atunci NU va fi creat niciun punct-cale.
- Daca exista un punct-cale pe linia timpului pentru acel parametru, dar nu si in cadrul-cheie care trebuie duplicat, atunci in noul cadru-cheie duplicat este creat un nou punct-cale cu o valoare pentru parametru, ca rezultat a valorii curente din cadrul-cheie original si un tip de interpolare TCB Smooth pentru ambele "In" si "Out".
Desigur, duplicarea unui cadru-cheie va produce un nou cadru-cheie in locul indicat de cursorul pentru timp si va adauga o pozitie noua in lista de cadre-cheie la locul corespunzator. In lista cu cadre-cheie, noul cadru-cheie adaugat are aceeasi descriere ca si cel original, plus un "(Duplicate)" la sfarsit.
Stergerea unui cadru-cheie
Selectati un cadru-cheie din lista cu cadre-cheie si apasati butonul Remove keyframe. Astfel se va sterge cadrul-cheie si toate punctele-cale din toti parametrii de pe toate straturile pe care se afla.
NOTE: Daca mutati un cadru-cheie prin modificarea timpului din lista de dialog cu cadre-cheie si apasati imediat butonul Remove Keyframe, atunci punctele-cale nu vor fi sterse. Este ori o eroare in aplicatie, ori s-a considerat ca e posibil sa doriti sa pastrati punctele-cheie si nu cadrul-cheie.
Editarea cadrelor-cheie: timp, lungime & descriere
Puteti vedea in antetul listei Keyframe cele patru etichete:
- Timp
- Lungime
- Jump - salt
- Descriere
Coloana Jump este doar o scurtatura pentru a aseza cursorul pentru timp la cadrul-cheie in care dati click in eticheta (JMP).
Timp
You can modify the time (frame) where the keyframe is placed just making a click in the corresponding Time cell. It will allow modify the time forward or backward the amount that you want. If you try to set the time of a certain keyframe to be the same time of another existing keyframe then the program gives you this message:
keyframe_set: Cannot change keyframe time because another keyframe already exists with that time.
Modifying the Time of a keyframe has the following effects:
- The existing waypoints in the keyframe will move to the new position.
- If any parameter have a a waypoint in the time line, then the moved keyframe will have a new waypoint set to TCB Smooth on those paramter(s).
- According to the default interpolation method and the Lock Keyframes status and to the parameters that have any waypoint in the time line, new waypoints will be created on the neighbouring keyframes of the destiny time (frame). The original neighbouring keyframes will be untouched if don't coincide with the destiny neighbouring keyframes.
- If a keyframe is displaced and doesn't "jump" over other existing keyframe then the waypoints that are surrounding the original position of the moved keyframe are compressed and / or expanded in the timeline depending on the displacement of the keyframe. See the examples. This is a recent discovered behaviour
See the example to see how that works.
Length
Length parameter sets the time the keyframe is exposed in the timeline until next keyframe. Changing the parameter shifts all following keyframes and waypoints forward or backwards.
Description
This cell allow the user insert a short description of the meaning of the keyframe. Just make click on it and change the text.
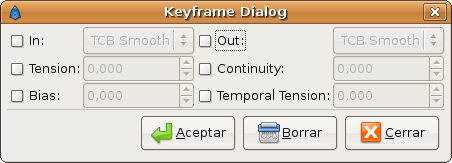
Editing Keyframe Properties
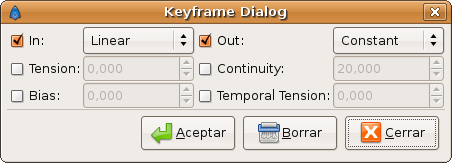
The Keyframe Properties dialog allows change the interpolation method for all the waypoints on the keyframe at the same time. Even if, for a certain parameter, there is no waypoint on the keyframe but the parameter have other waypoints in the time line, then when you apply the Keyframe Properties you will add a waypoint at that keyframe were there aren't currently any waypoint. The added waypoints have the interpolation methods stated by the dialog. It means that the Keyframe Properties dialog will modify the interpolation methods for all the parameters that have any waypoint in the time line.
The dialog have the following parameters:
- In: Checking this value you can change the interpolation method of the left part of the waypoints of the current selected keyframe of all the layers of the canvas to the selected interpolation method in the drop down menu.
- Out: Same but for the right part of the waypoint.
- Tension: See TCB
- Bias: See TCB
- Continuity: See TCB
- Temporal Tension: See TCB
You can check only one of both "In" or "Out" check boxes to only affect the change to the left or right part of the waypoints. The non checked part would not be modified. Same comment applies for the Manual interpolation method parameters (Tension, Bias, Continuity and Temporal Tension)
This dialog would not affect what's the interpolation method for a new waypoint created by the user, automatically created by the keyframe duplication or by the lock keyframe state. The interpolation methods for new waypoints created in those cases will be both the same (In and Out or Left and Right) and depend only on the Default interpolation method of the Tool Box window.
See the examples to understand better how it works.
Examples
Duplicate a keyframe with no waypoint on it
For example, imagine that you have following set of keyframes and waypoints and the corresponding parameter of the radius of a circle:
| Frame | Keyframe | Waypoint | Radius | Interpolation |
|---|---|---|---|---|
| 0s | yes | yes | 20.0 | TCB Smooth |
| 2s | yes | no | 25.0 | n/a |
| 4s | yes | no | 30.0 | n/a |
| 8s | no | yes | 40.0 | TCB Smooth |
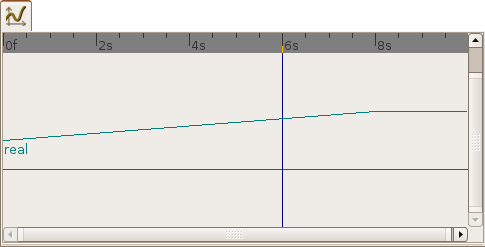
notice that although the interpolation between 0s and 8s is TCB Smooth the real result
is linear due that they are the only two waypoints of the animation for that parameter.
If you select the keyframe at 2s, place the time cursor at 6s (where there isn't a keyframe), set the default interpolation to TCB Smooth, and have the lock keyframe status to All keyframes locked and press the duplicate keyframe button, then the result is the following:
| Frame | Keyframe | Waypoint | Radius | Interpolation |
|---|---|---|---|---|
| 0s | yes | yes | 20.0 | TCB Smooth |
| 2s | yes | no | 25,78125 | n/a |
| 4s | yes | yes | 30.0 | TCB Smooth |
| 6s | yes | yes | 25.0 | TCB Smooth |
| 8s | no | yes | 40.0 | TCB Smooth |
You can see that:
- At 0s none has changed. Not affected by the insertion of the keyframe. It is two keyframes away from 6s and also have a waypoint.
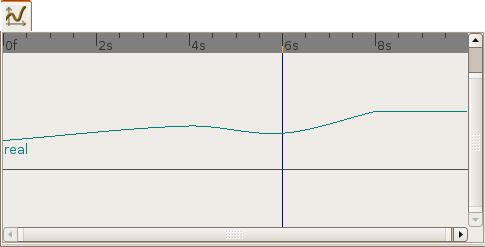
- At 2s there was a keyframe and stills there. But previous to the creation of the keyframe at 6s the current interpolated value of the radius was 25.0. After the creation of the keyframe at 6s the radius is the result of the interpolation between 0s and 4s frames waypoints with its radius values and its interpolation methods. That is 25.78125. This keyframe is more than one keyframe away from the new 6s keyframe so no waypoint is created.
- At 4s there was a keyframe and still being there. But in this case the 4s keyframe is a neighbor of the new 6s keyframe. As well as the lock keyframe state was set to All keyframes locked then the keyframe at 4s has been locked adding a waypoint on it. The radius value hasn't changed (still being 30.0) because it was locked adding a waypoint with its current value). The Interpolation mode of the waypoint was set to TCB Smooth as stated by its default value.
- At 6s there is a new keyframe with a new waypoint with the old value of the interpolated value of the keyframe at 2s. That is a radius of 25.0.
- At 8s nothing has changed. There wasn't any keyframe and there was a waypoint so nothing is expected to change.
Imagine now that you repeat the same operations but you choose the default interpolation set to Constant. Then the result is the following:
| Frame | Keyframe | Waypoint | Radius | Interpolation |
|---|---|---|---|---|
| 0s | yes | yes | 20.0 | TCB Smooth |
| 2s | yes | no | 20.0 | n/a |
| 4s | yes | yes | 30.0 | Constant |
| 6s | yes | yes | 25.0 | TCB Smooth |
| 8s | no | yes | 40.0 | TCB Smooth |
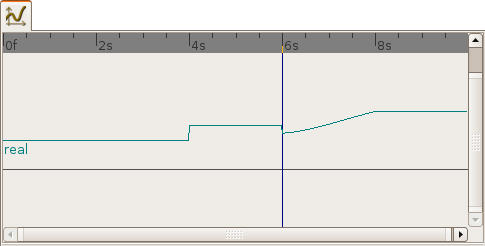
Now you can see that the keyframe at 2s doesn't hold the value of the parameter by itself. It only remember the value if a waypoint is created on it, by the result of the insertion of a neighbour waypoint, or if a keyframe is duplicated and the lock keyframe status affects that keyframe. In this example the value at 2s has changed drastically due to the different interpolation method for the created waypoint on 4s. If in this situation you duplicate again the keyframe at 2s to other frame (ej. 10s) then it would copy a keyframe with a waypoint on it with a radius's value of 20.0, what is the current value of the parameter in that keyframe before duplicate it.
Editing Keyframe Properties
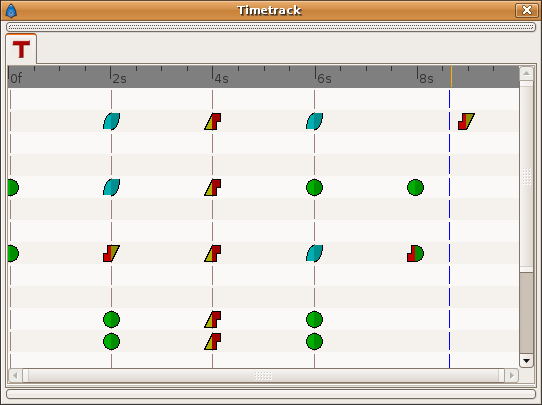
Consider this situation for a certain layer:
In the sample the animation duration is 10 seconds so the image shows all the existing waypoints and keyframes. The time cursor isn't over any keyframe.
Now consider that you have the following default values:
- Default Interpolation method set to "Ease in/out"
- Lock Keyframes status set to "All Keyframes Locked"
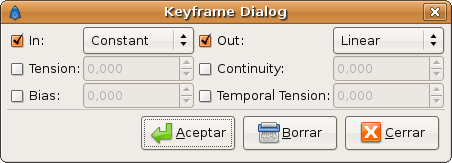
Now select the keyframe at frame 4s in the keyframe list. Press the Keyframe Properties button and set the following interpolation method:
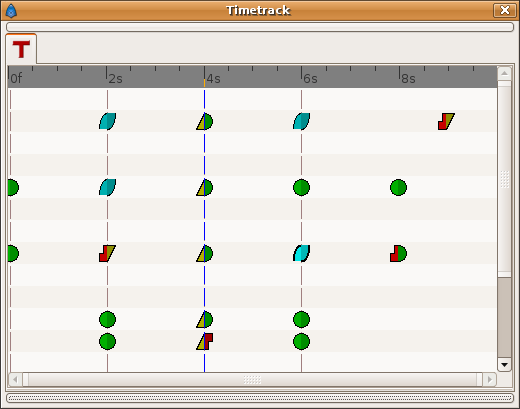
and press Apply button. The result will be this:
You can see the following effects:
- The existing waypoints at 4s keyframe have changed its interpolation methods according to the Keyframe Properties dialog.
- There are new added waypoints at 4s keyframe. The waypoints are added to the paramters that have almost one waypoint in the time line (for example the one that have only a waypoint at 9s). The added waypoints at 4s keyframe have the interpolation settings that was stated by the Keyframe Properties dialog.
- New waypoints have been created for the neighbouring keyframes to 4s (2s and 6s) fo all the parameters that have any waypoint in the time line. The waypoints are created in the neighbouring keyframes according to the Lock Keyframes status. Also the created waypoints interpolation method responds to the default interpolation method you have set.
If in the Keyframe Properties dialog you were checked off the Out or the In check boxes then it would have happened two things:
- The existing waypoints at 4s would only change its interpolation method on the side the check box was checked on. The other side will be untouched.
- The new added waypoints will have the interpolation method set to TCB Smooth method where the check box is off and the interpolation method set by the keyframe properties dialog where the check box is on.
In this sample it was only checked on the "In" check box.
Change Keyframe Time
Without waypoints between keyframes
Consider again this situation for a certain layer:
Now consider that you have the following default values:
- Default Interpolation method set to "Ease in/out"
- Lock Keyframes status set to "All Keyframes Locked"
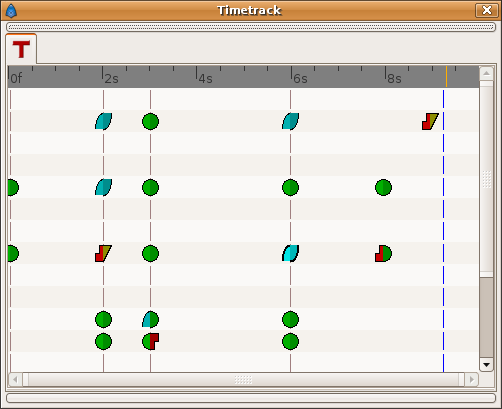
Now select the keyframe at frame 4s in the keyframe list. Make a click in the Time cell and modify the time to be 3s. The result will be this:
With waypoints between keyframes
Consider now this situation for a certain layer:
Now consider that you have the following default values:
- Default Interpolation method set to "Ease in/out"
- Lock Keyframes status set to "All Keyframes Locked"
Now select the keyframe at 4s in the keyframe list. Make a click in the Time cell and modify the time to be 2s. The result is this:
You can see how the waypoints at right and left of the moved keyframe have been compressed and expanded in the time line. Also notice that any waypoint has been formed in the moved keyframe at the paramter at the bottom of the list but yes in the static keyframes. It seems to be a bug (?).
Trying to understand this behaviour I see that also the keyframes keep the waypoints between two adjacent keyframes although you move them, keeping the distribution of the waypoints in the portion of time line between keyframes. This behaviour doesn't happen if the moved keyframe "jumps" over other keyframe when moved. Please add here as much information you can discover about keyframes behaviour. It seems that there are some bugs and any information is welcome
Advanced uses of keyframes
Reusing keyframes
If you want to learn more about advanced uses of keyframes see this tutorial about reusing animations. Keyframes can be like stored "poses" that can be reused several time in the animation. Very useful for lip sync.
Usage of Onionskin
To properly use the onion skin feature (ALT-O or File>View>Toggle Onion Skin) you should consider the frame where the keyframes are set. Onion skin will show you the before and after keyframes images with a 50% opaque copy of the current view. Also the current view is 50% opaque.
See Onion Skin for more detail.
